Stripe Integration
Step 1: Setting Up Stripe Payments API for Your Chatbot Through ActivePieces
Step 1: Adding Your Product to Stripe
- Go to the Stripe website and log in.
- On the left side menu, click on "Product Catalog".
- Click the "Add product" button on the right side of the page.
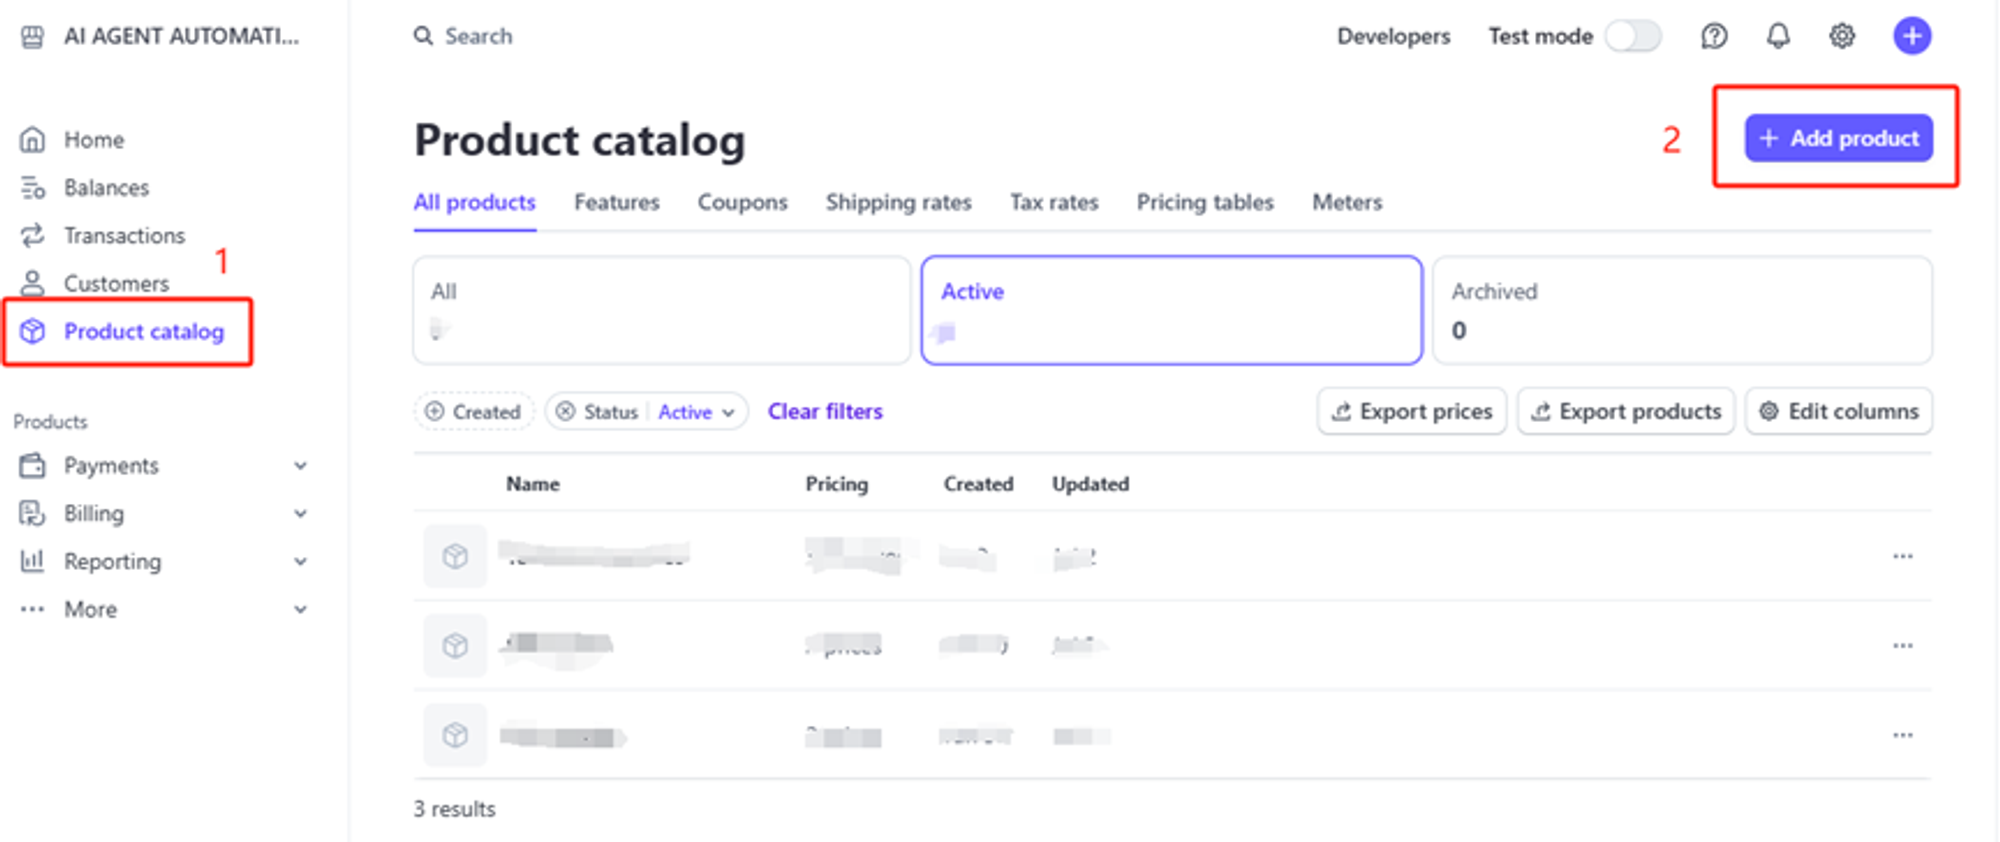
- Fill in the details about your product (name, description, etc.).
- Click "Add product" to save.
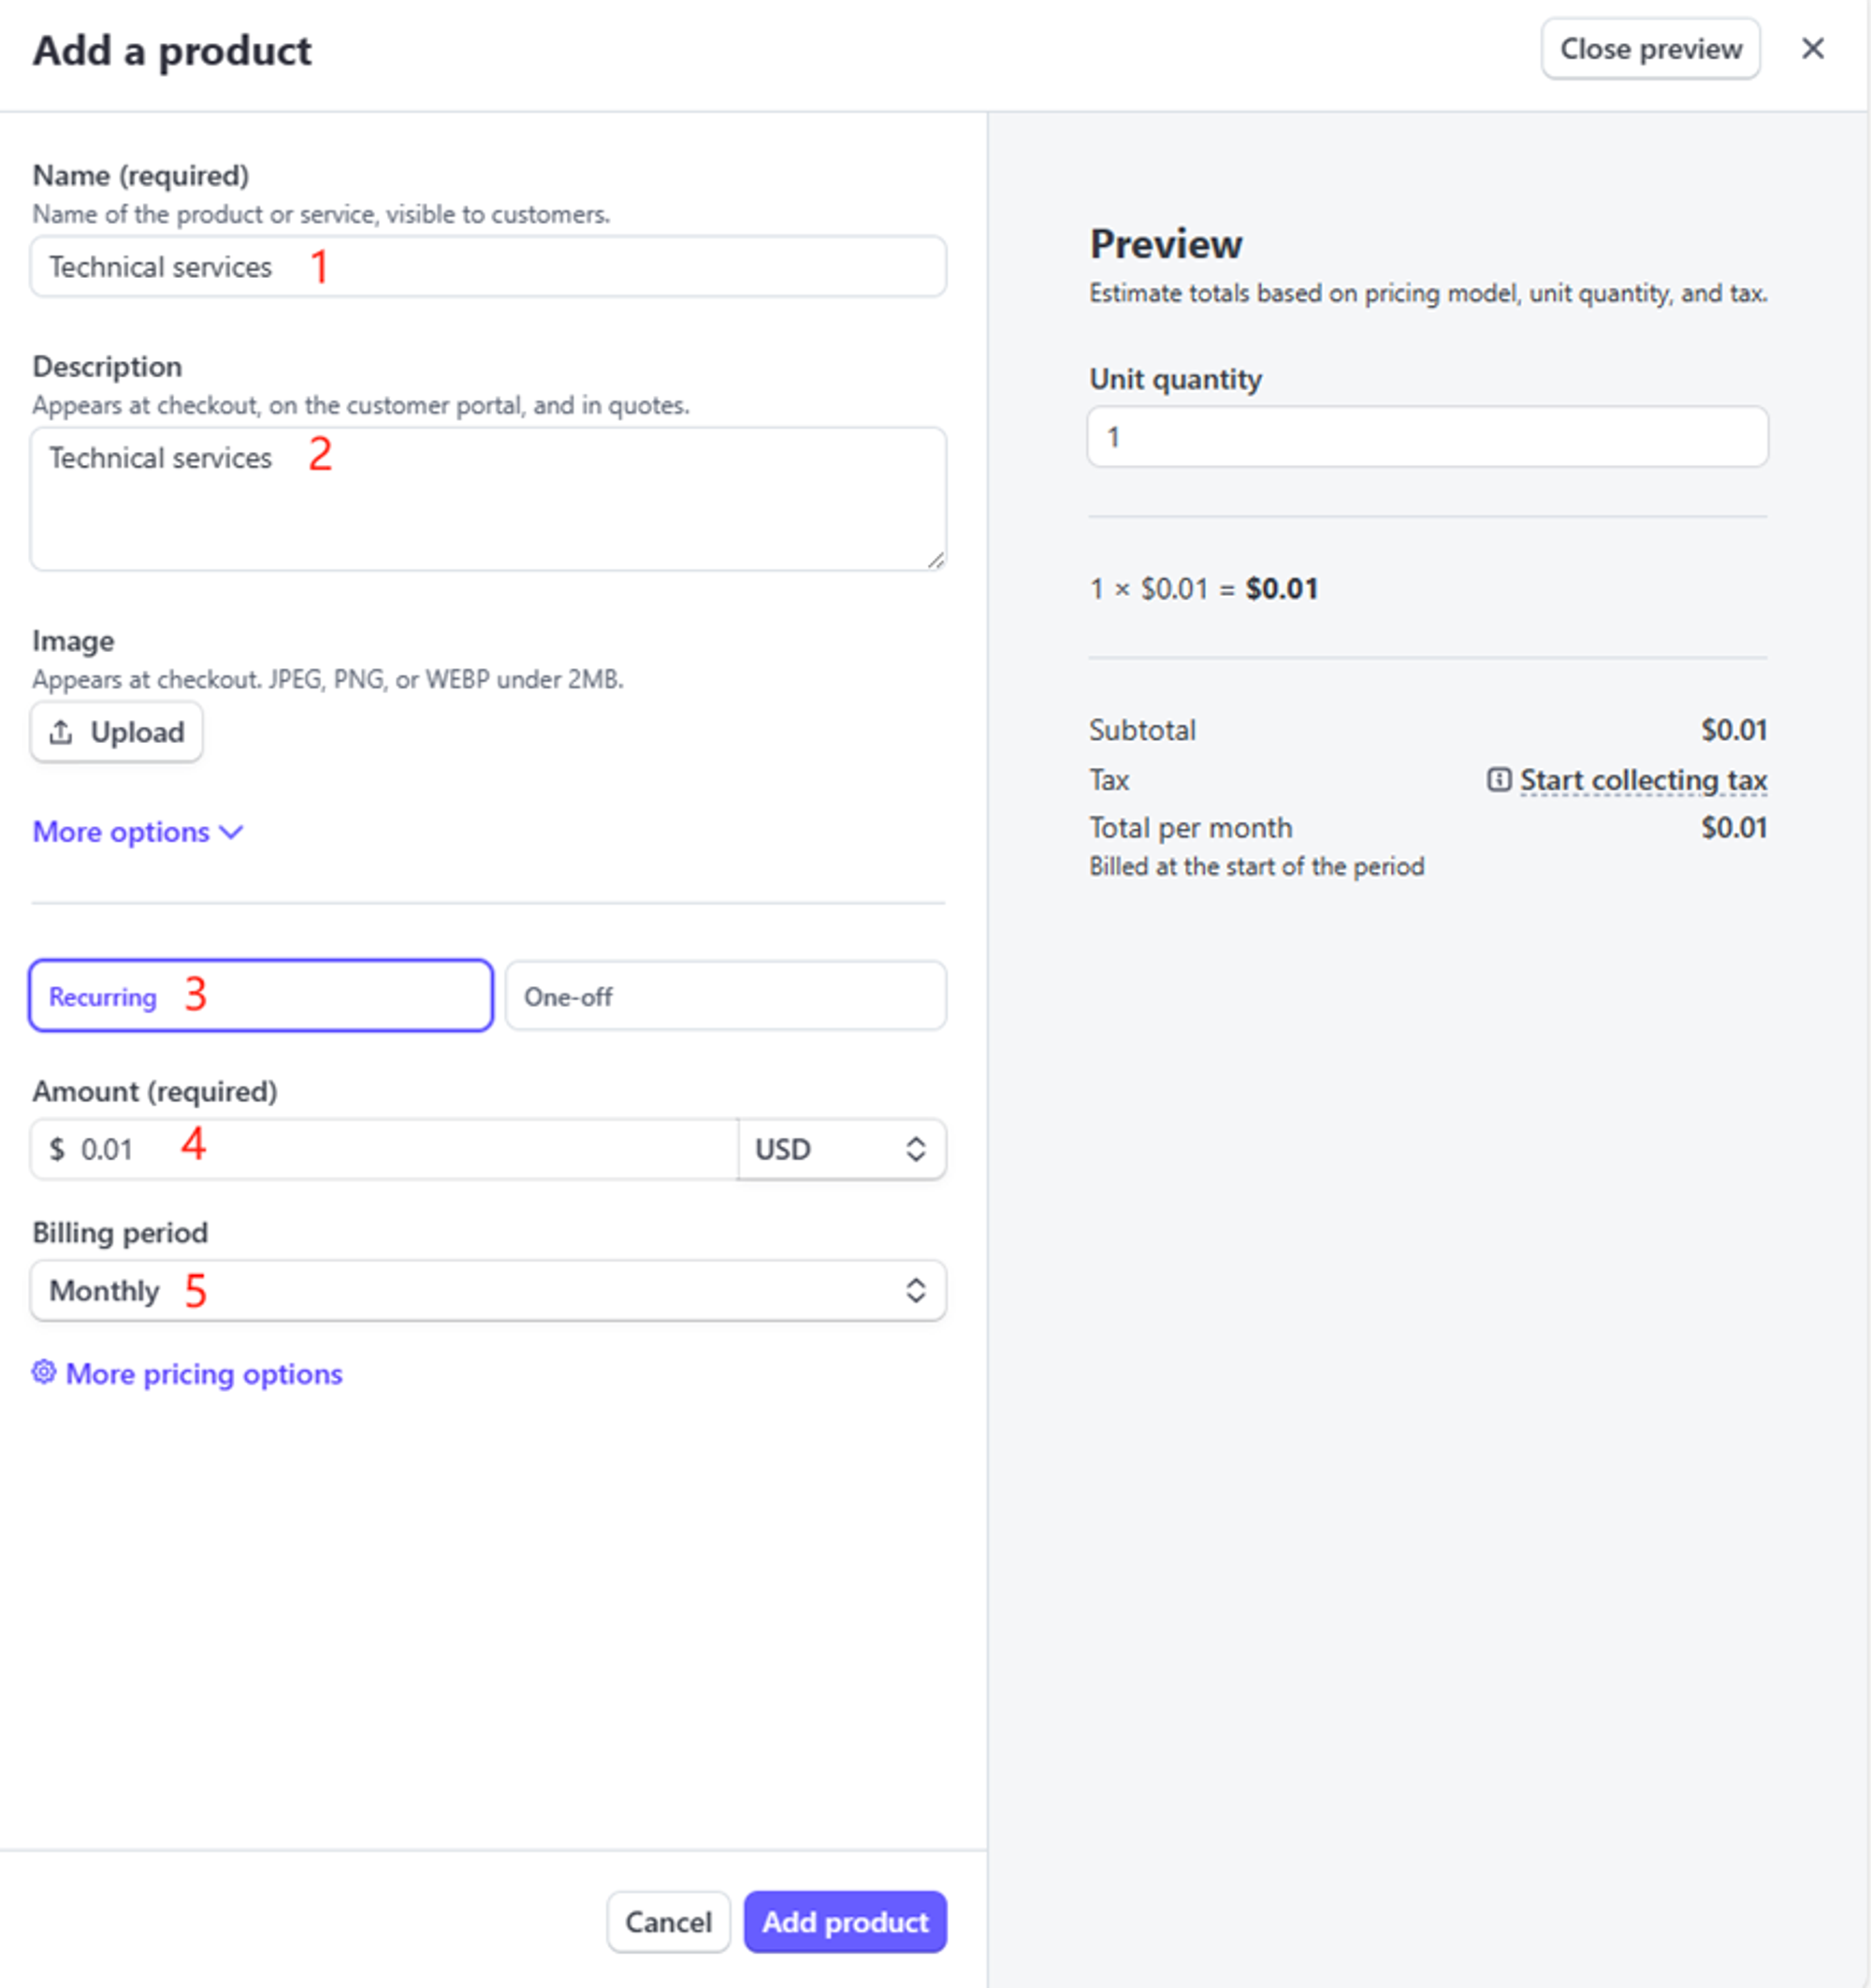
Step 2: Setting Up Pricing
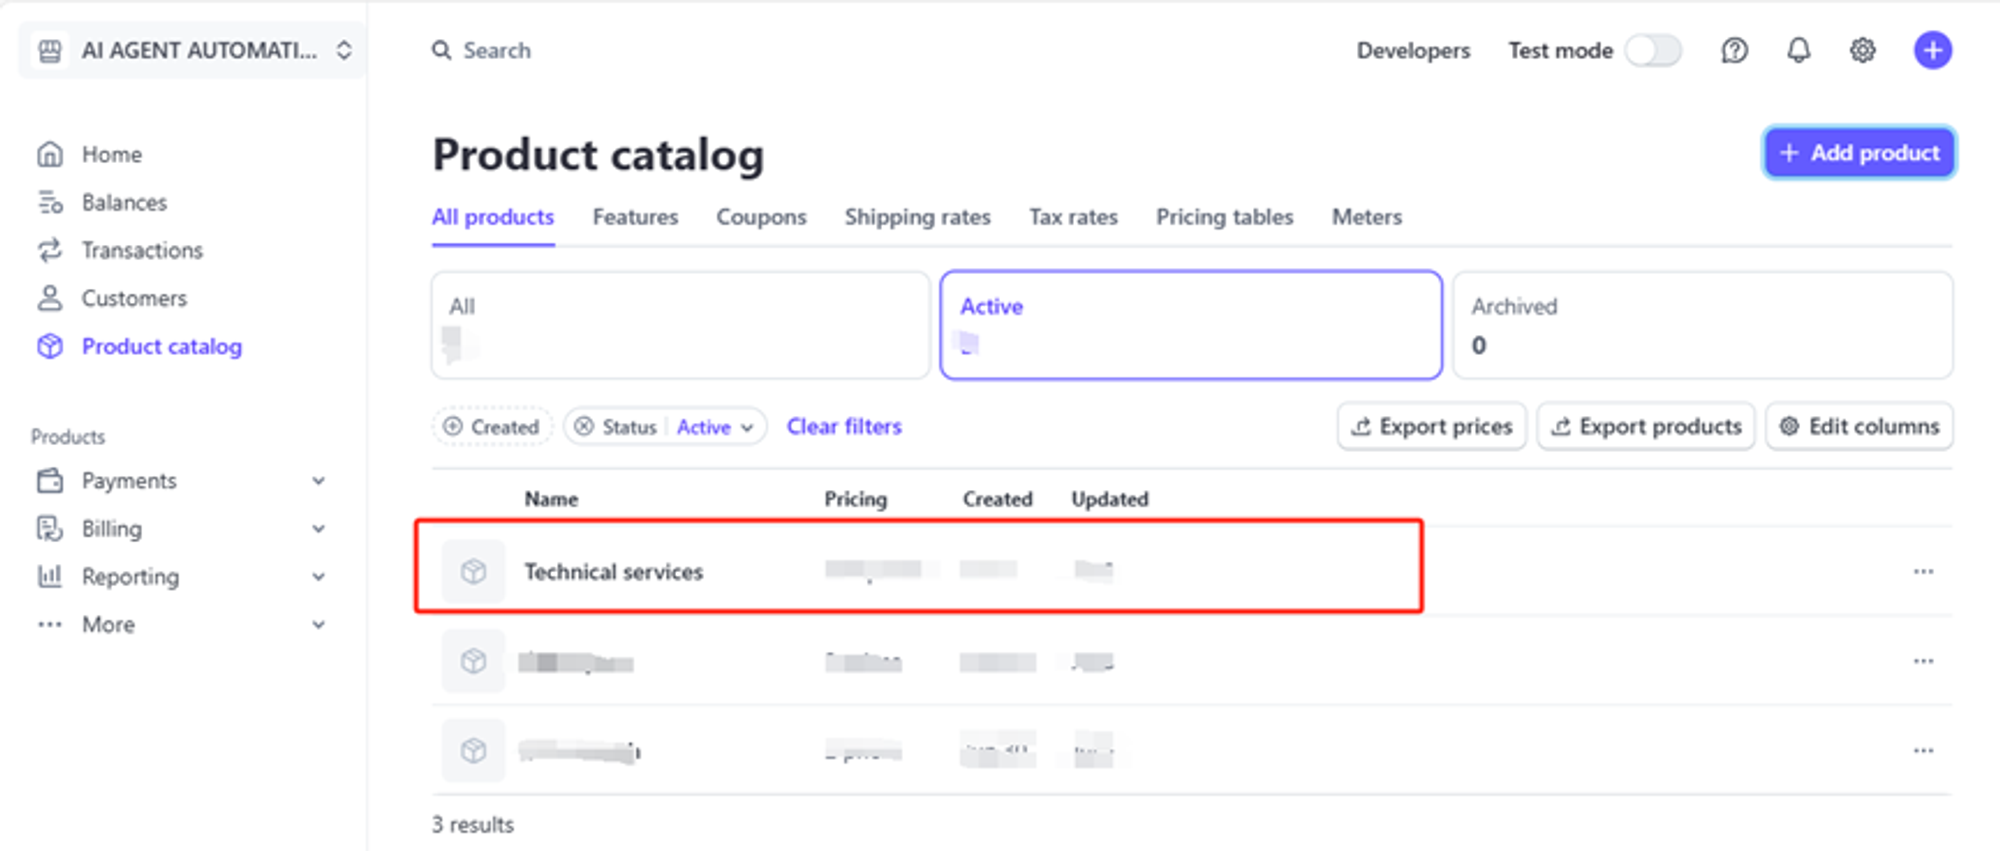
- In your product list, click on the product you just added.
- Look for the "Add price" button and click it.
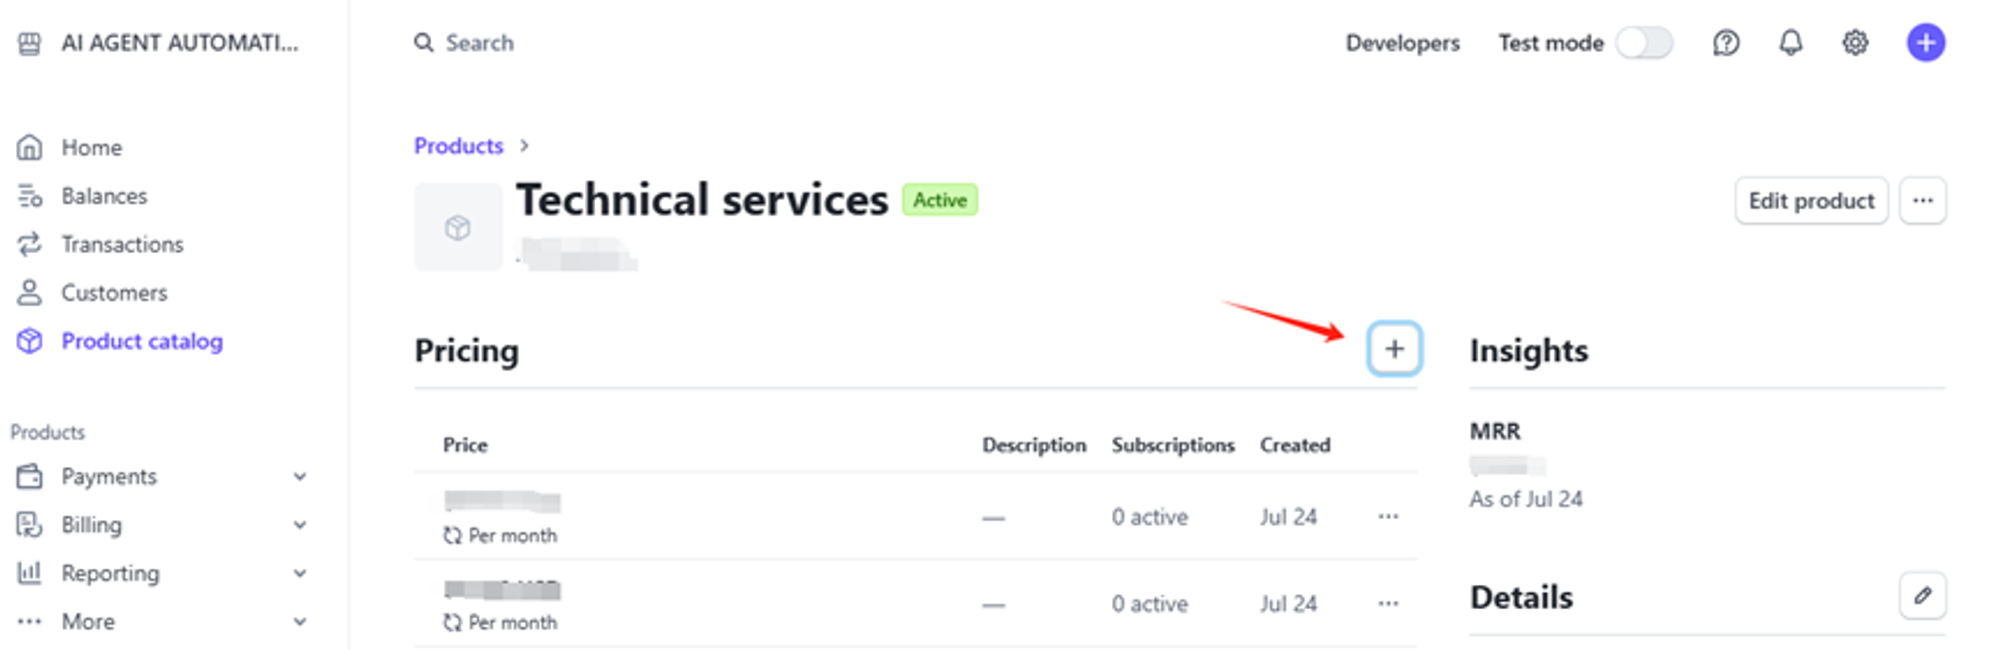
- Enter the price details (amount, currency, billing period if applicable).
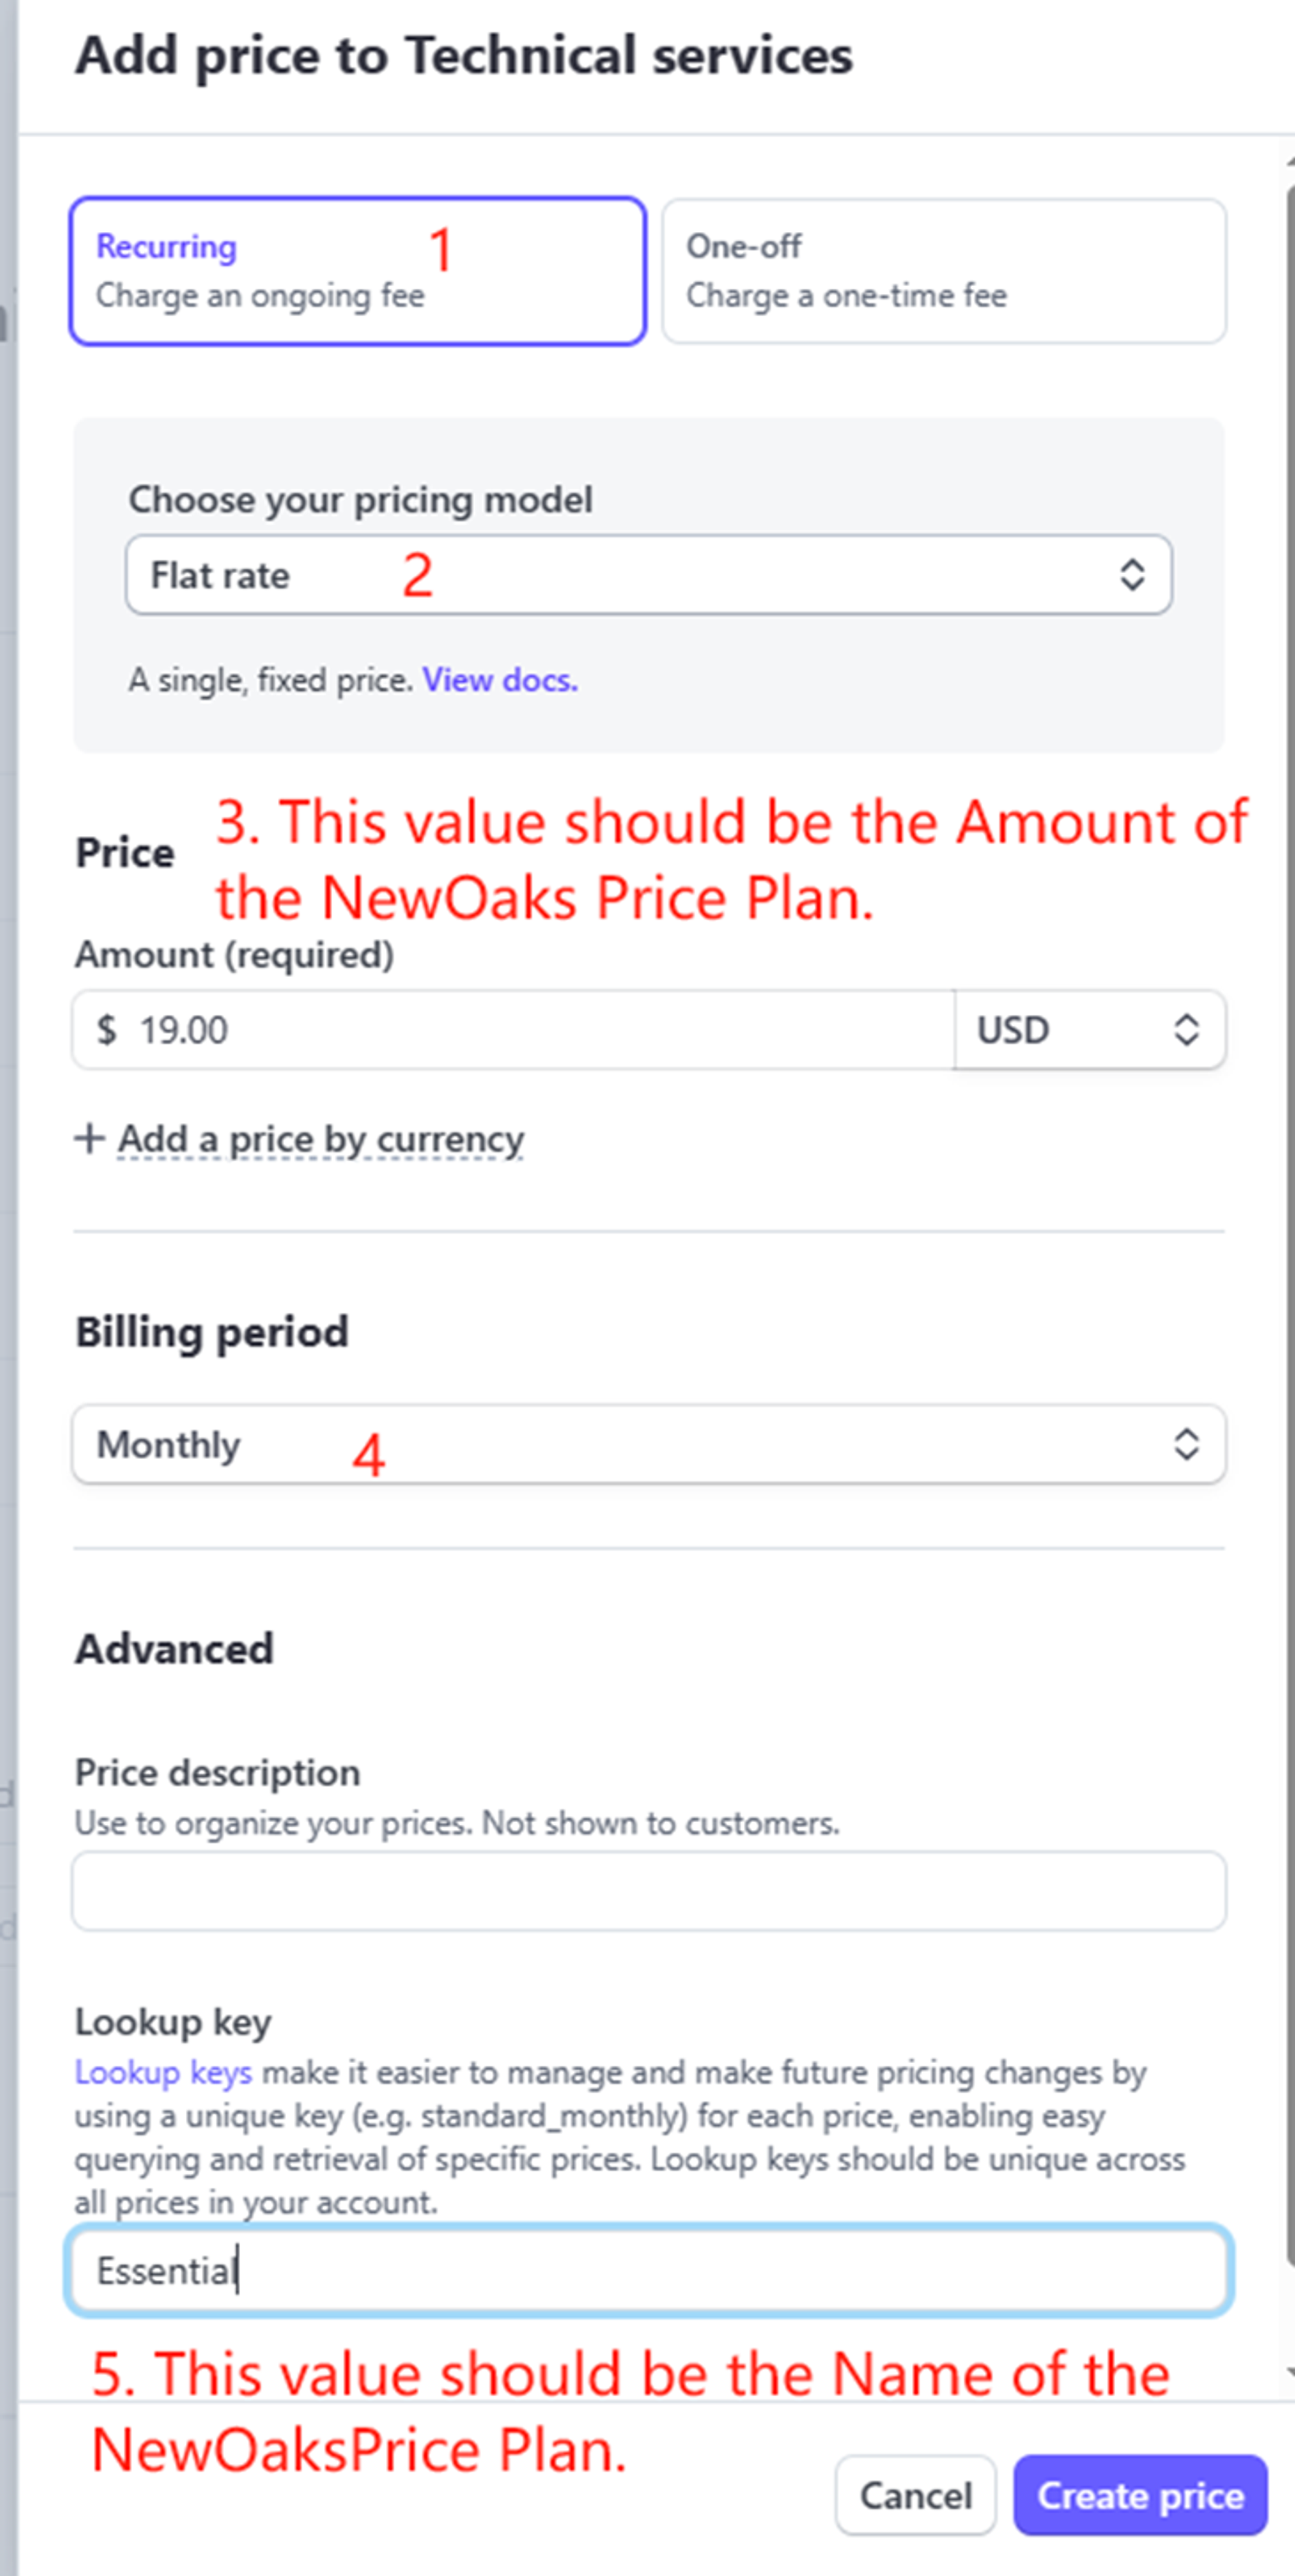
- Click "Add price" to save.
- Repeat this process for all the plans listed in your
PricePlan List.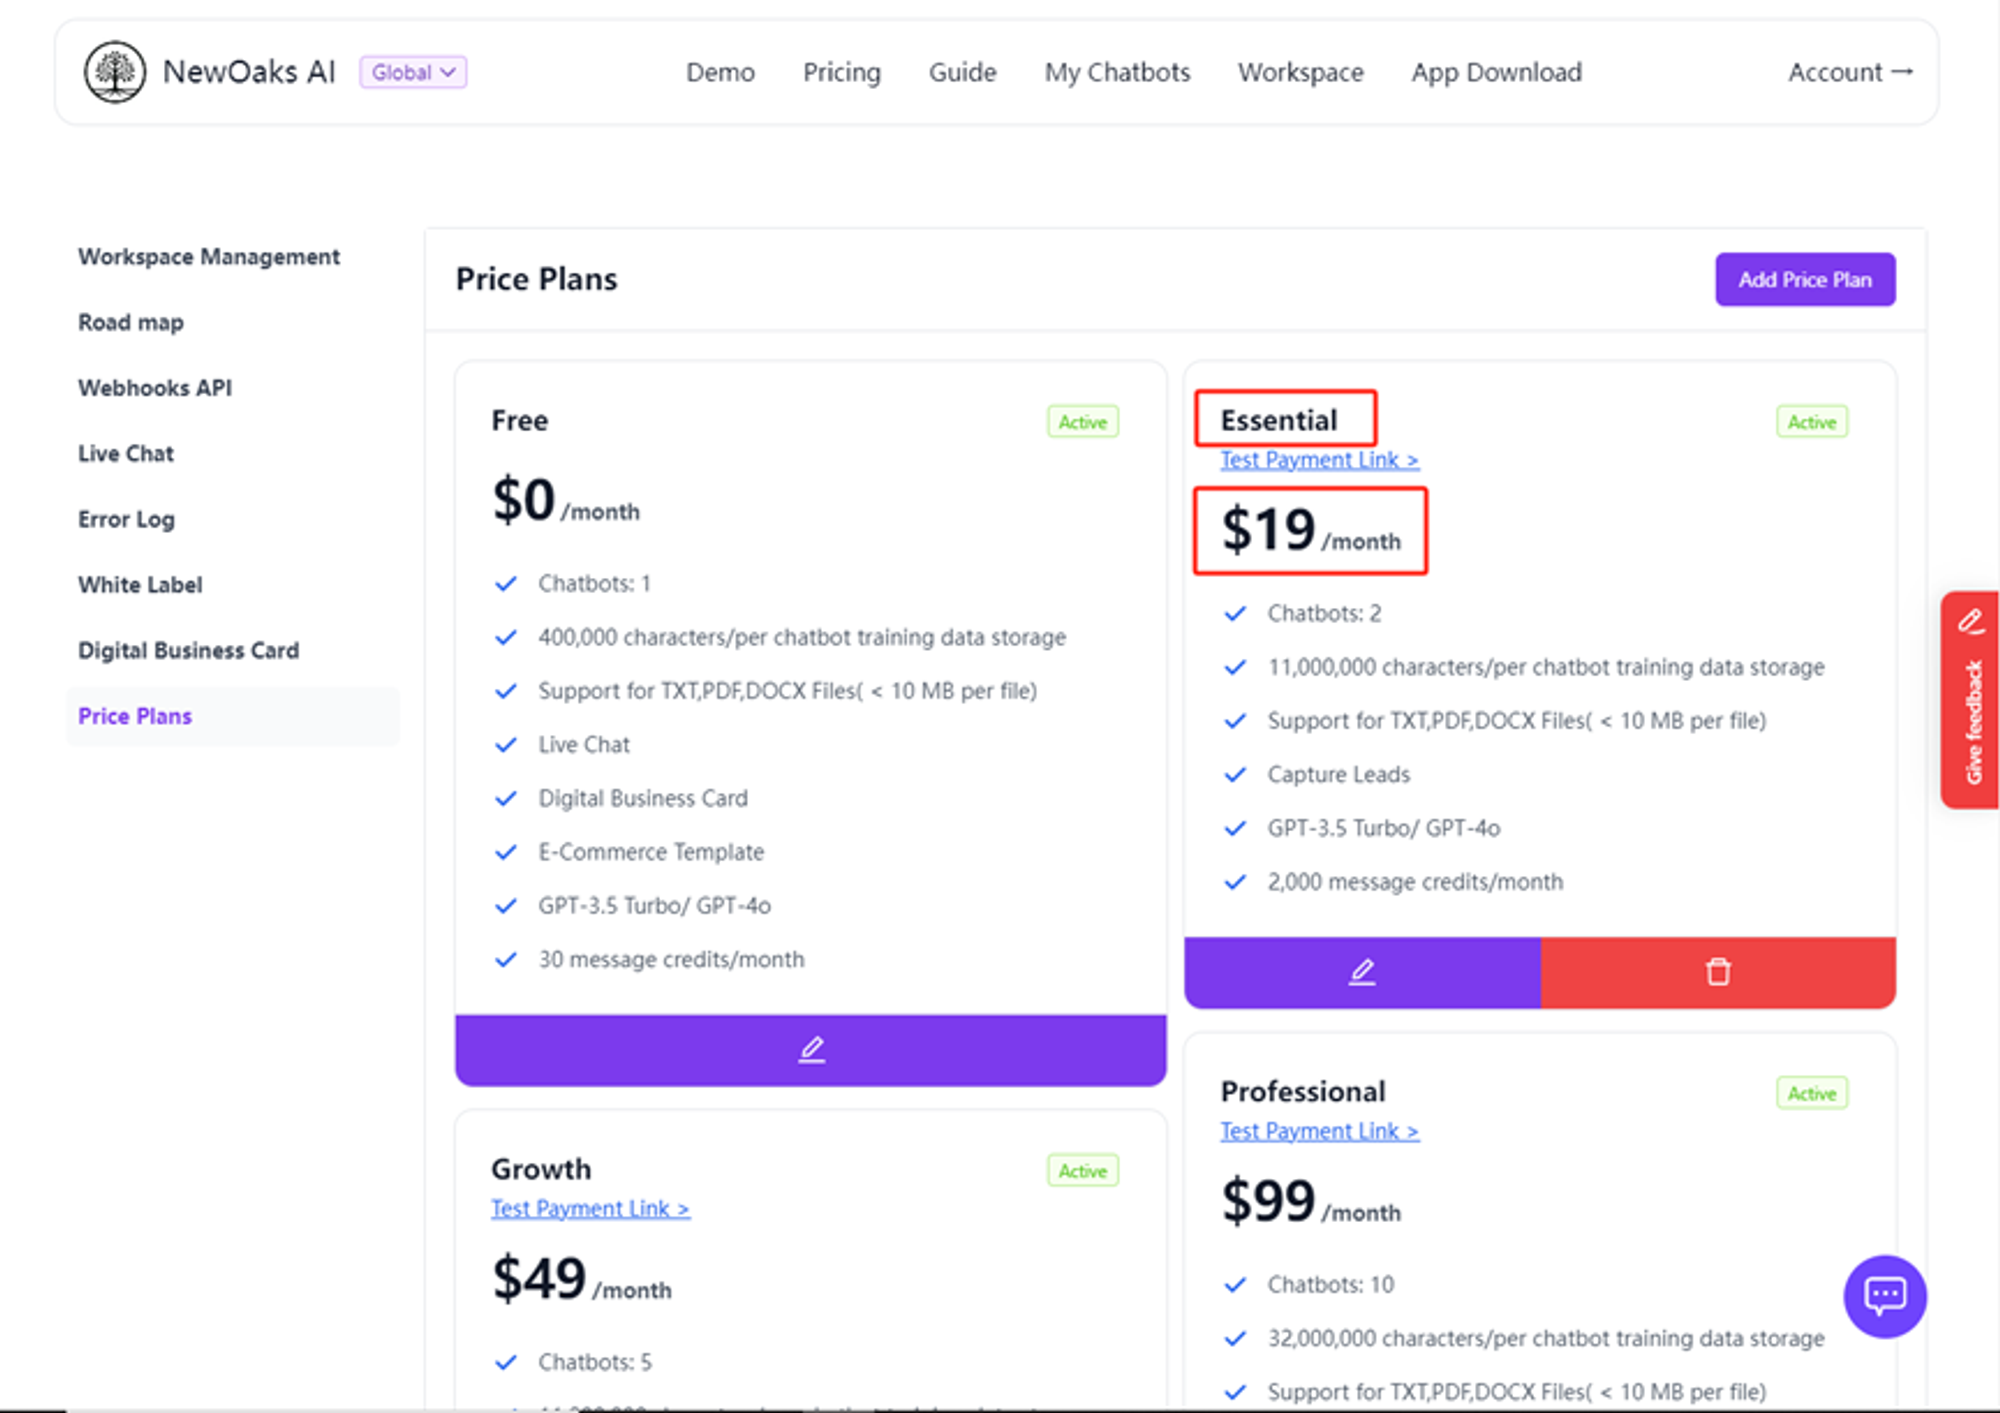
Step 3: Creating a Test Product
- Create a special price called "TestProductPrice".
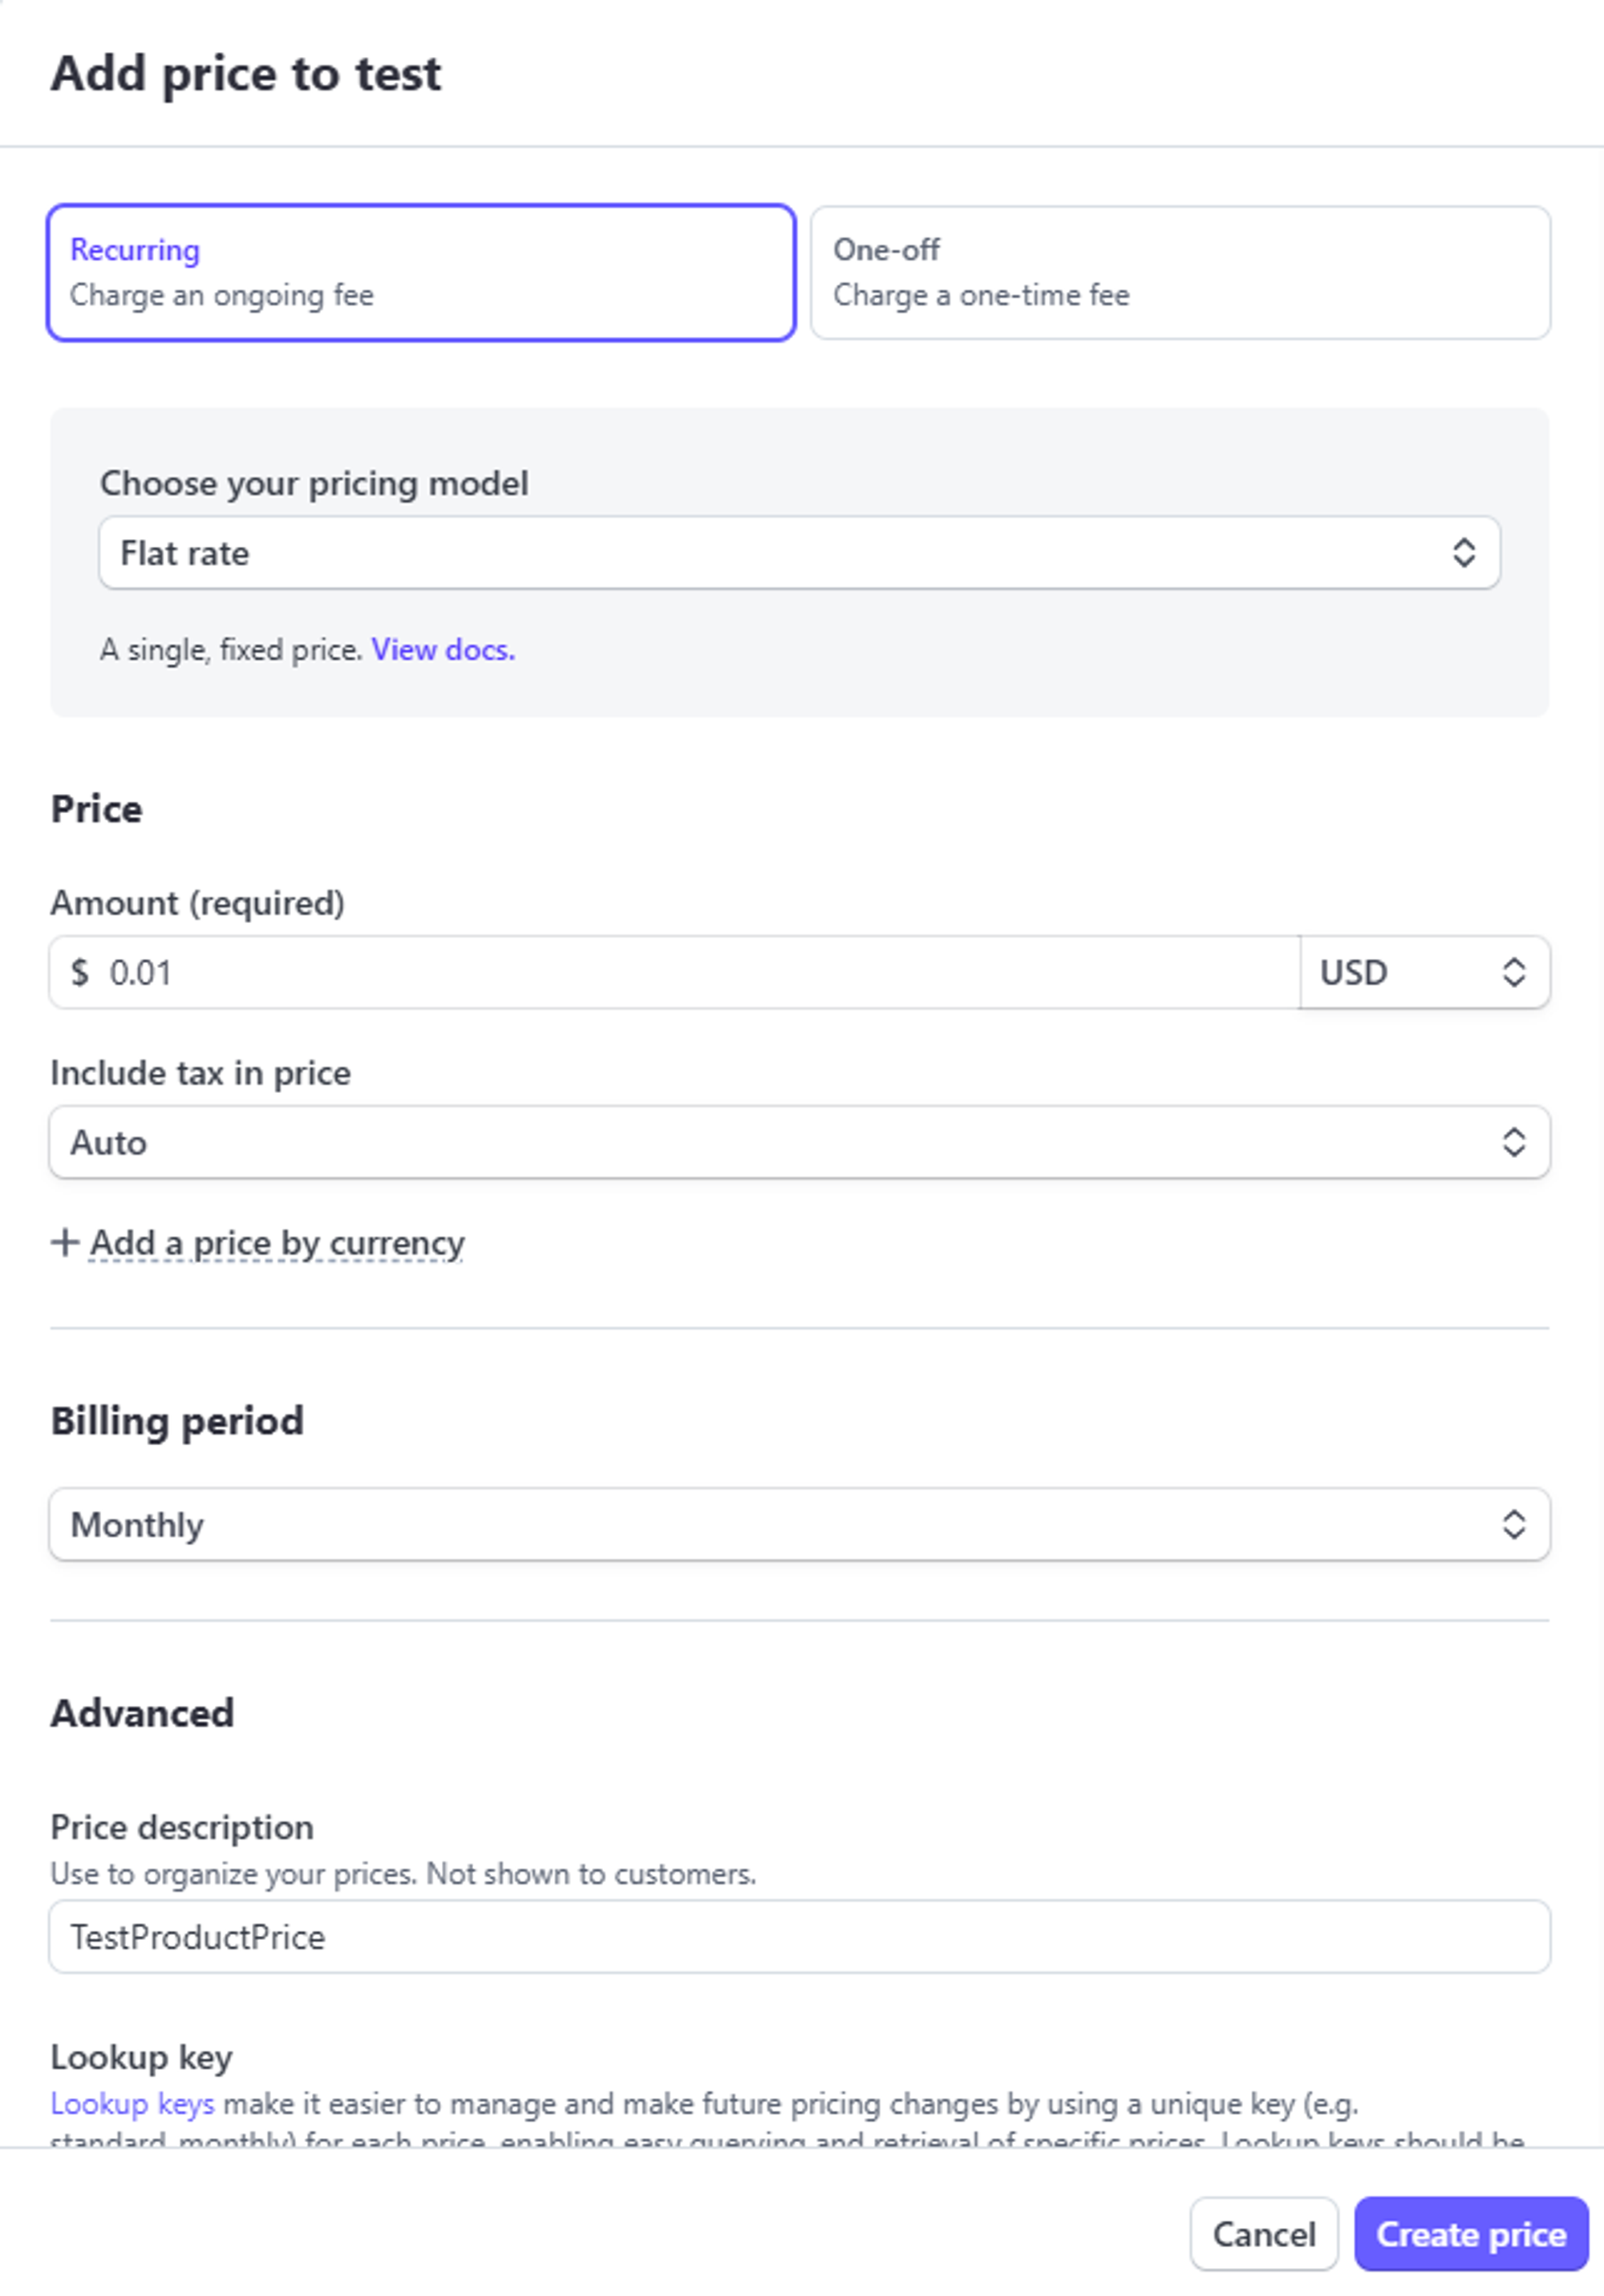
- Set its price to a very small amount (like $0.01).
- This is just for testing - you can delete it later.
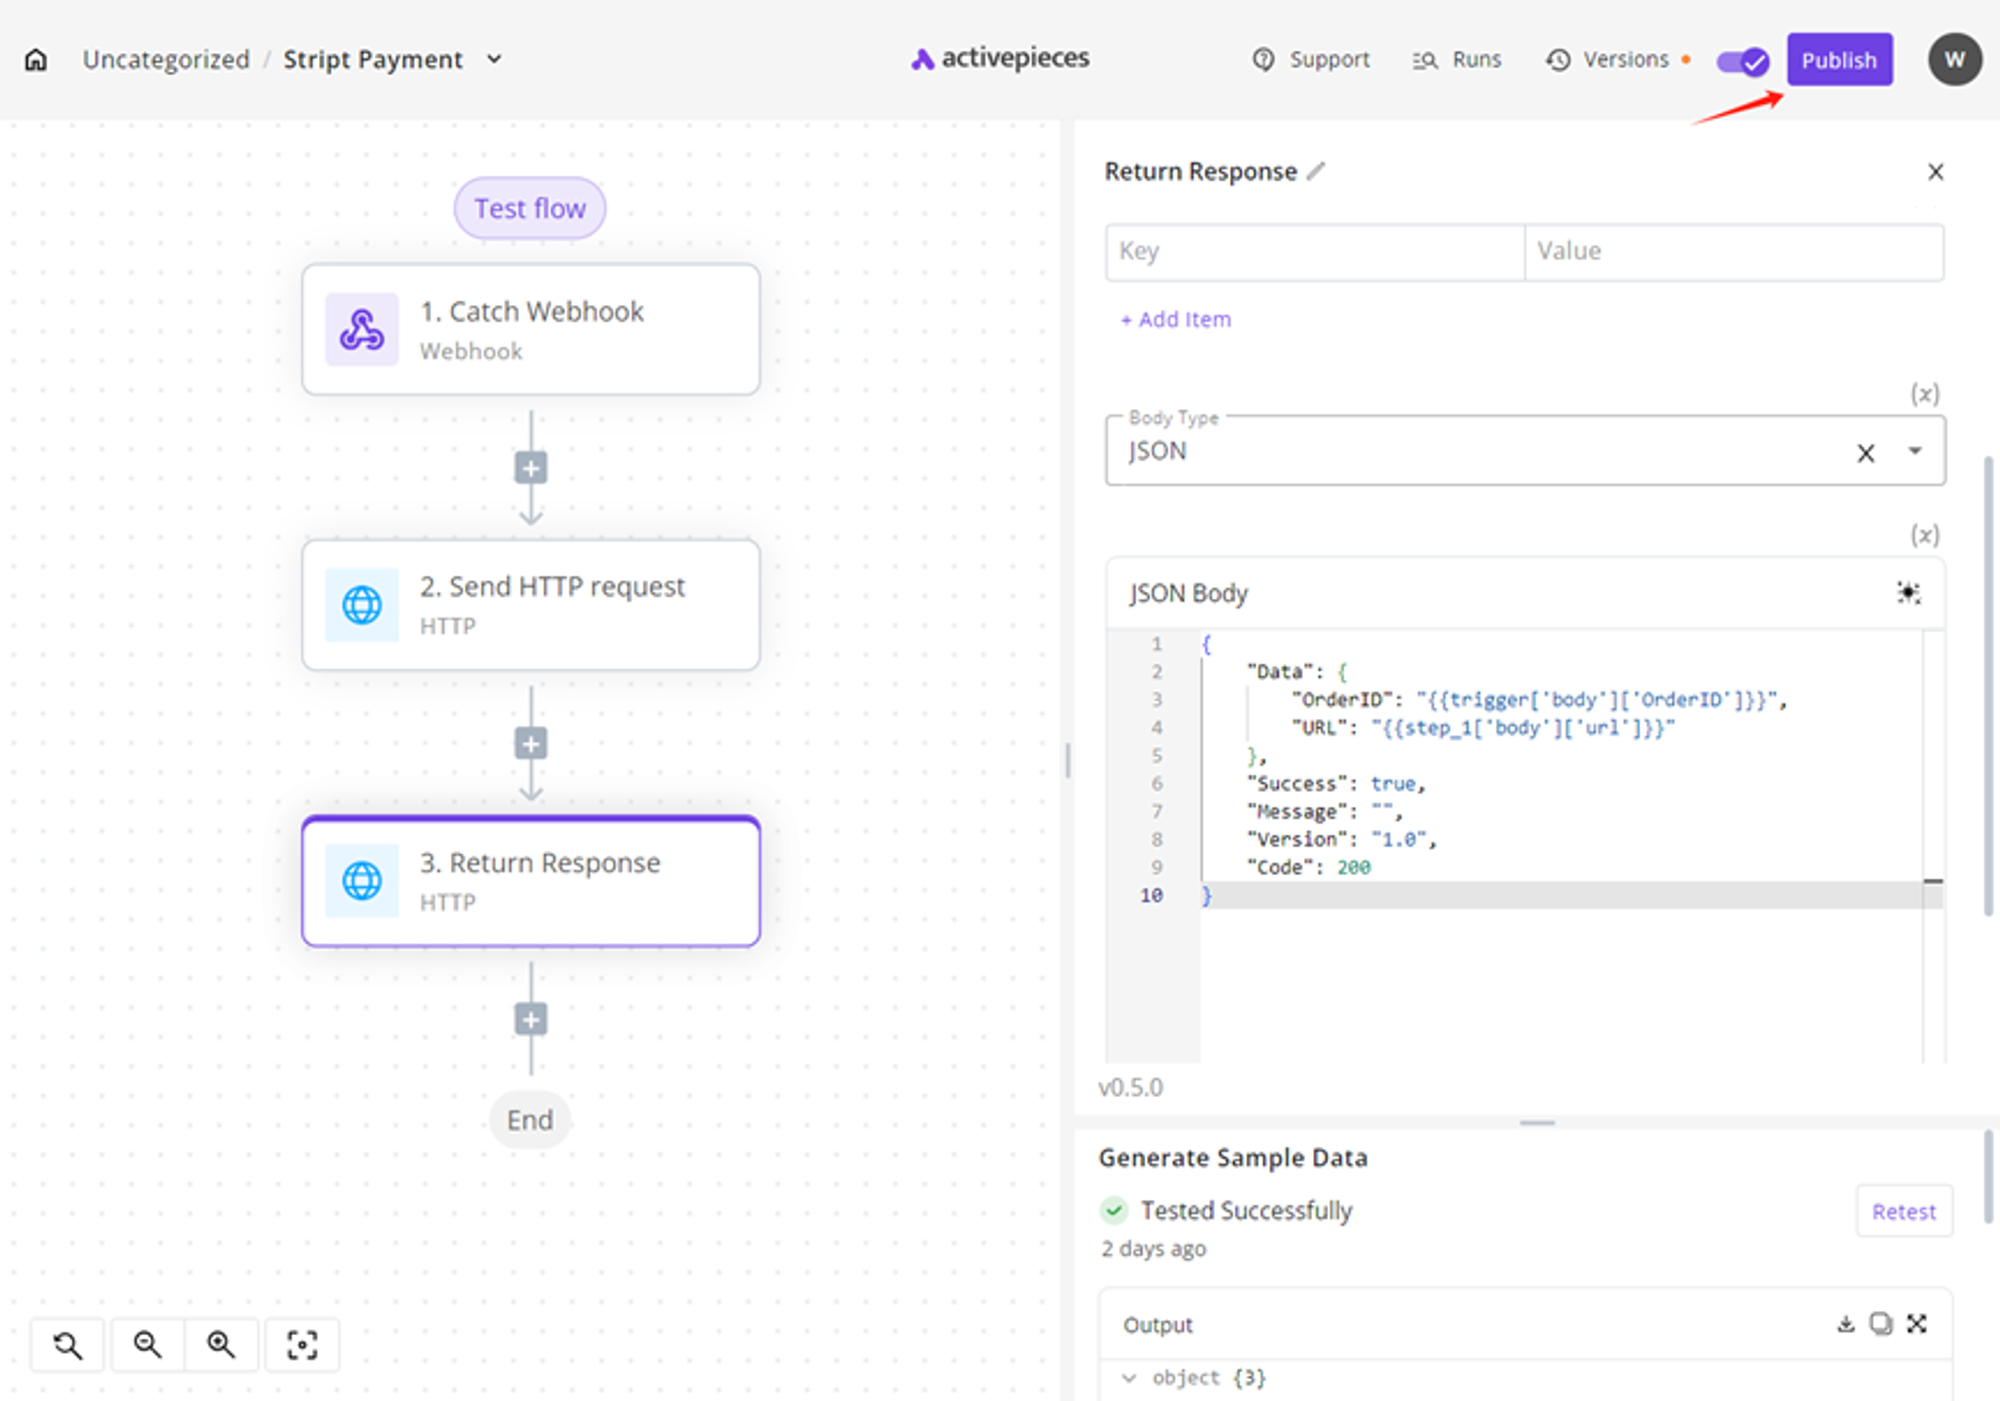
Step 4: Setting Up the Payment Flow
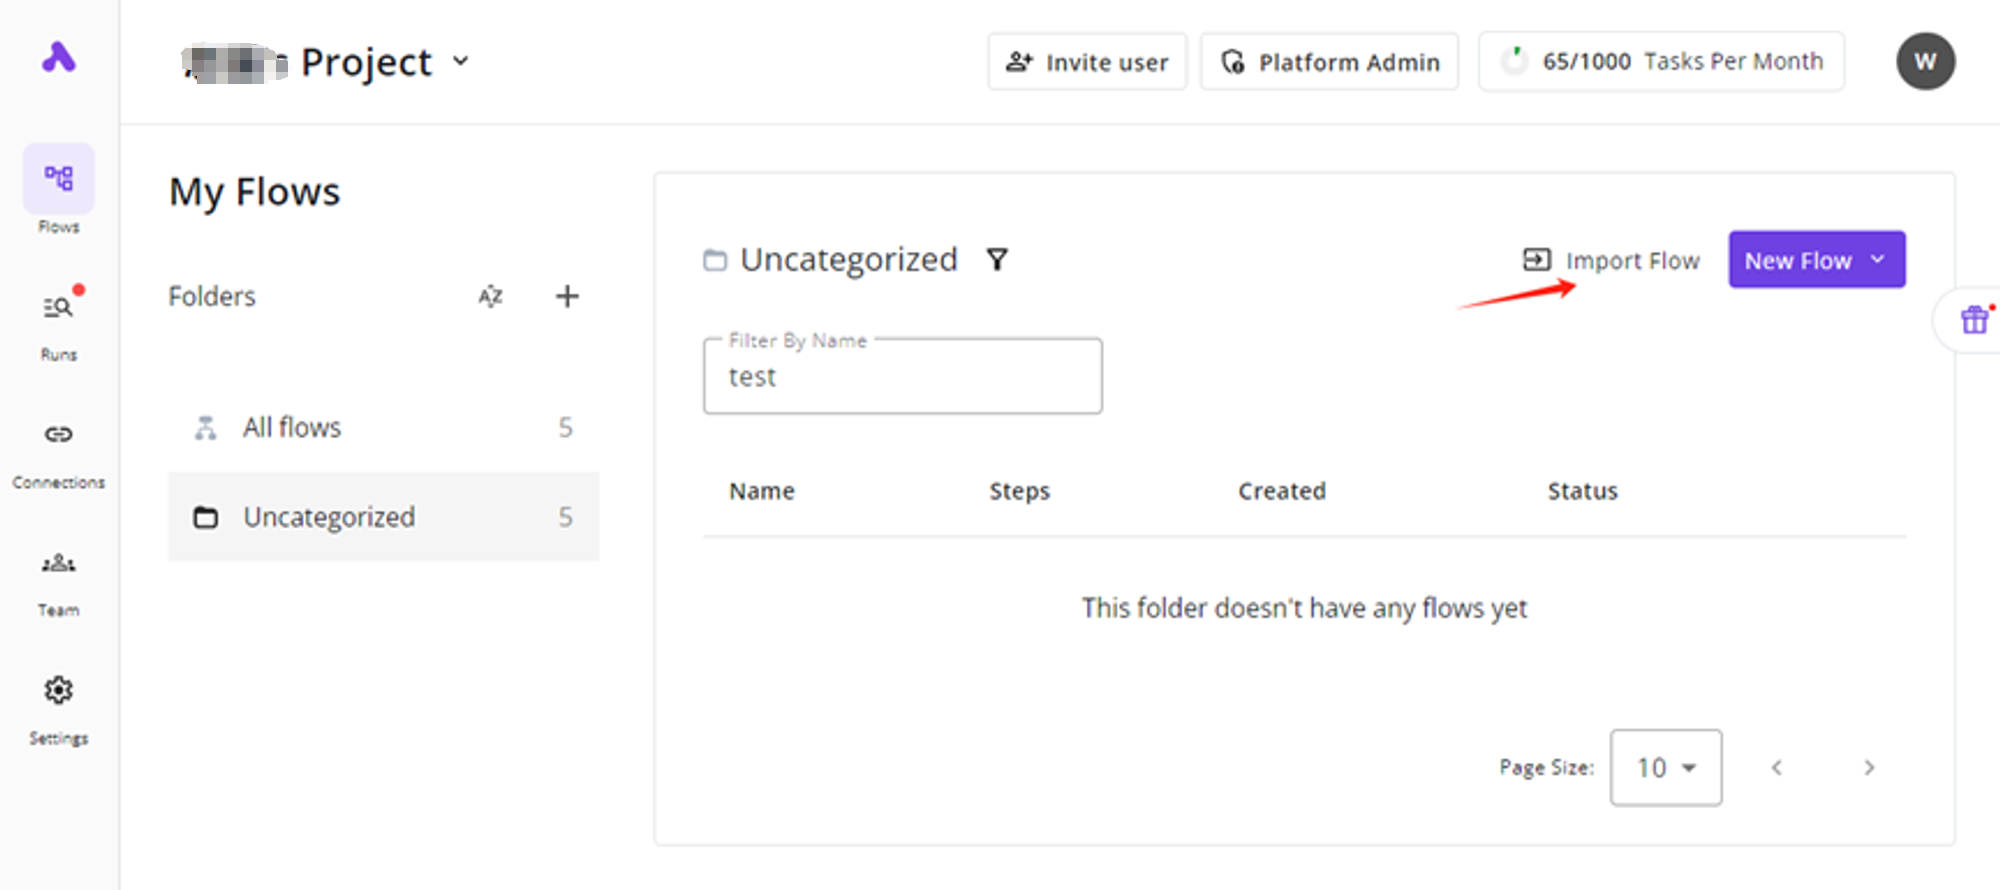
- We'll use a no-code platform tool called ActivePieces, but you can use any similar tool you're comfortable with.
- Download the template from: Stripe_Checkout
- In ActivePieces, click "Import Flow" and select the file you just downloaded.

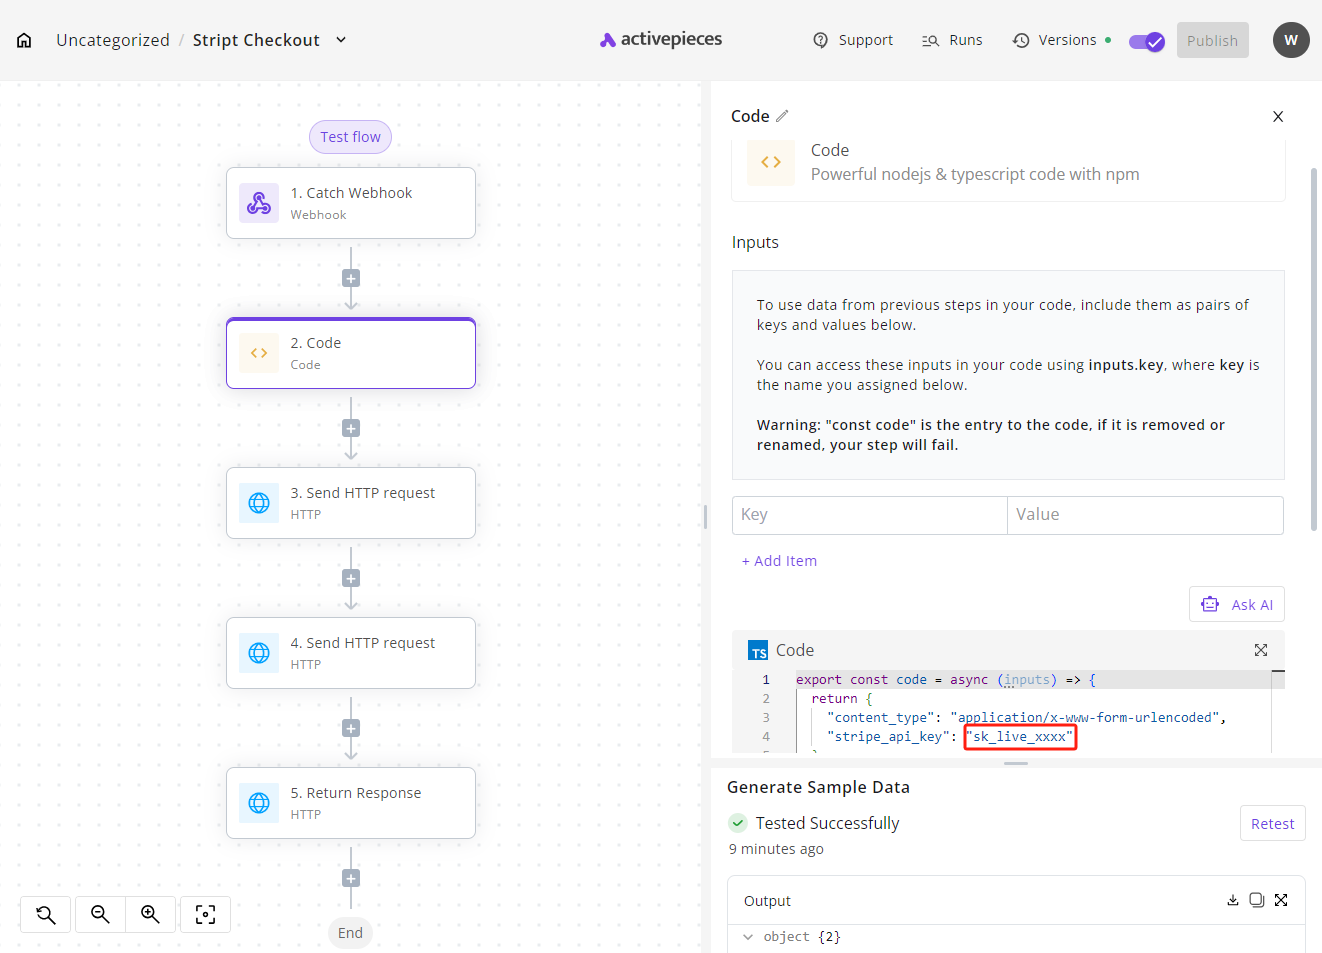
- You'll need to enter your Stripe API Secret key in the appropriate field.
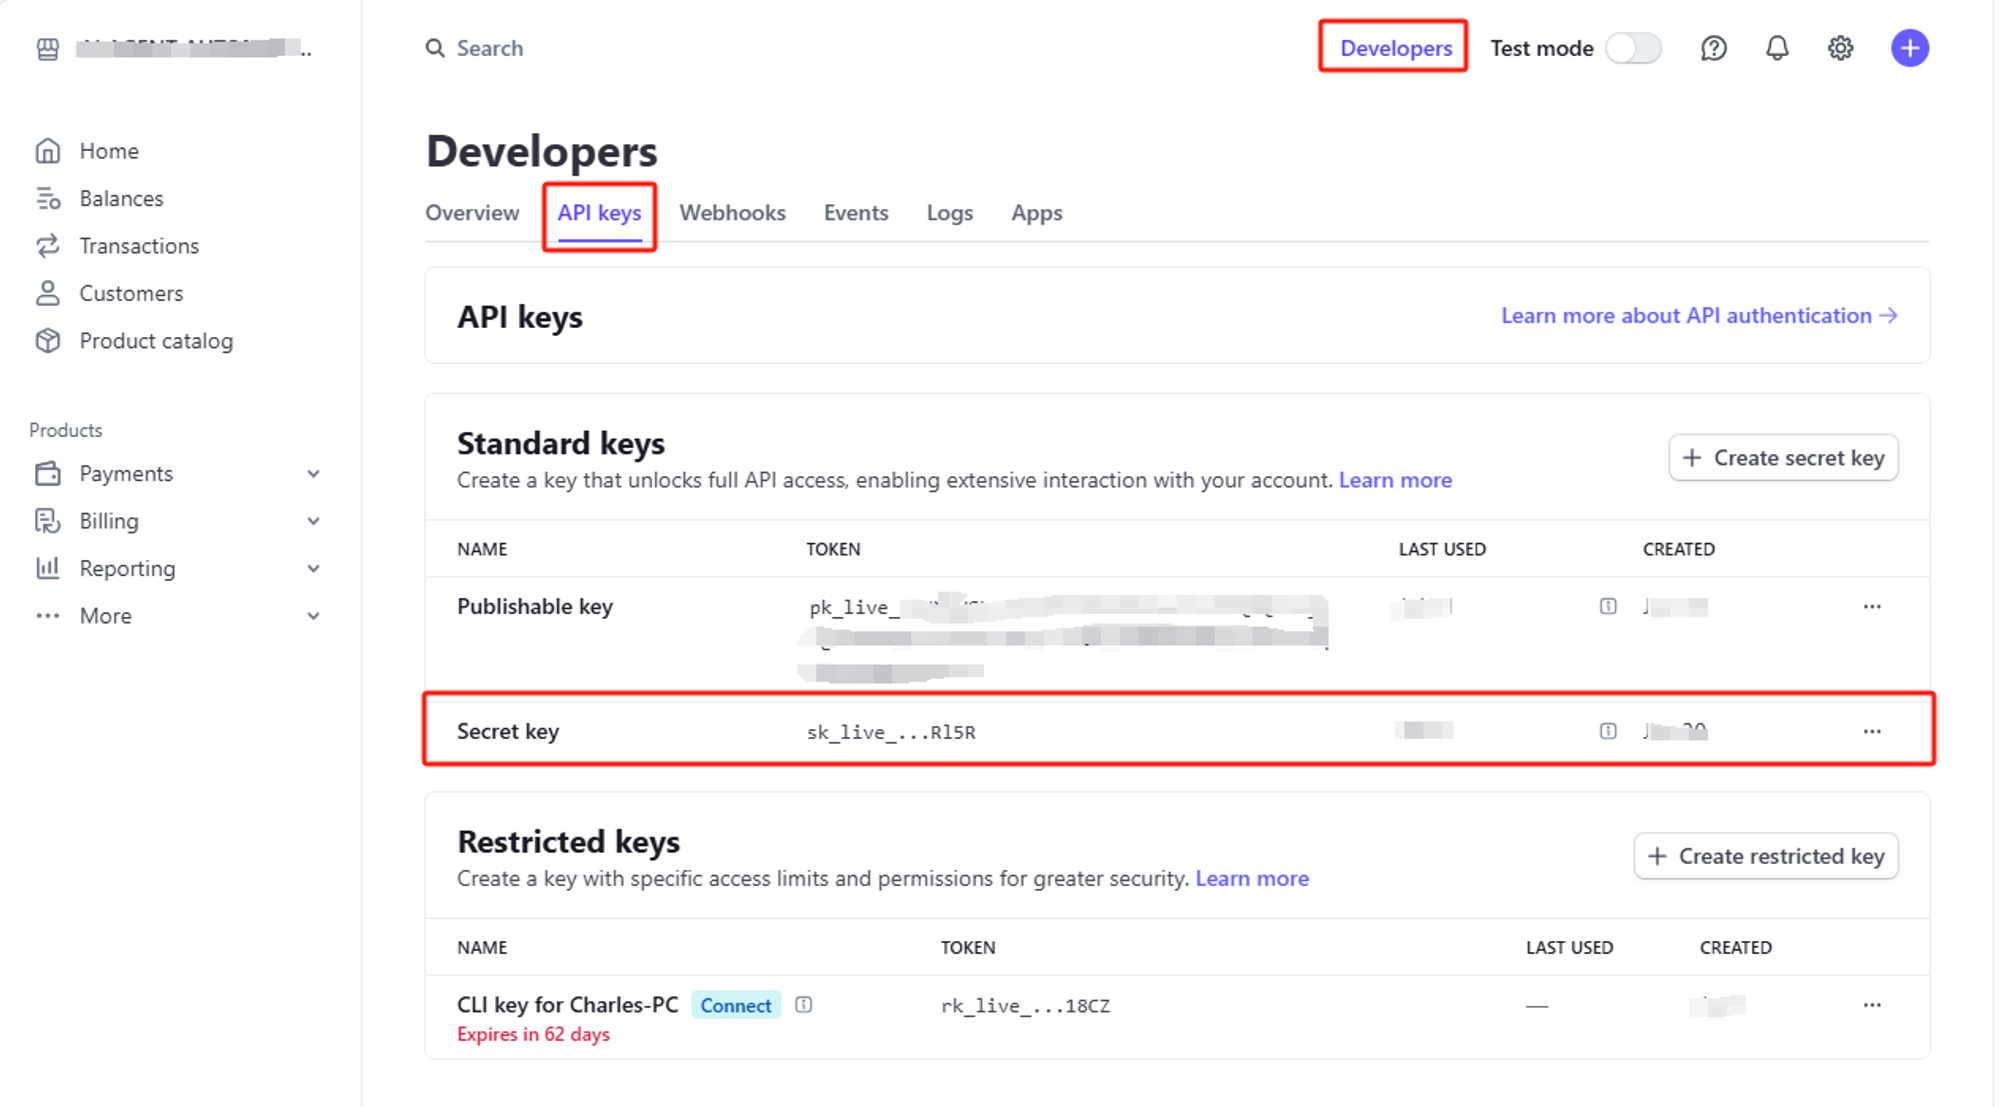
- Paste Secret Key into the red box below and replace the text in quotation marks:
- Click "Publish" to make your flow live.

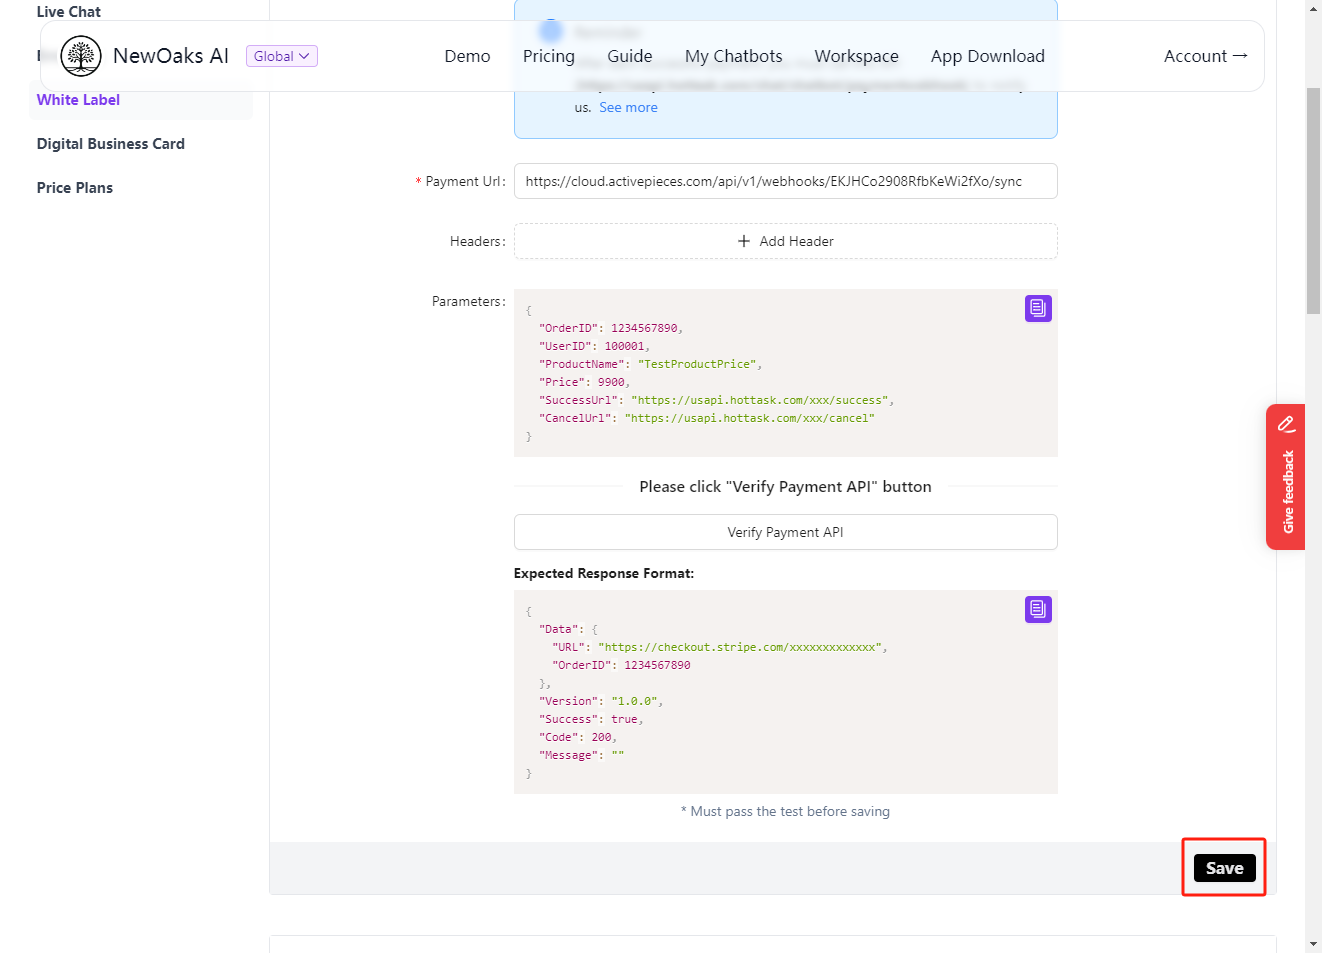
Step 5: Connecting to
- After publishing, you'll get a webhook URL.
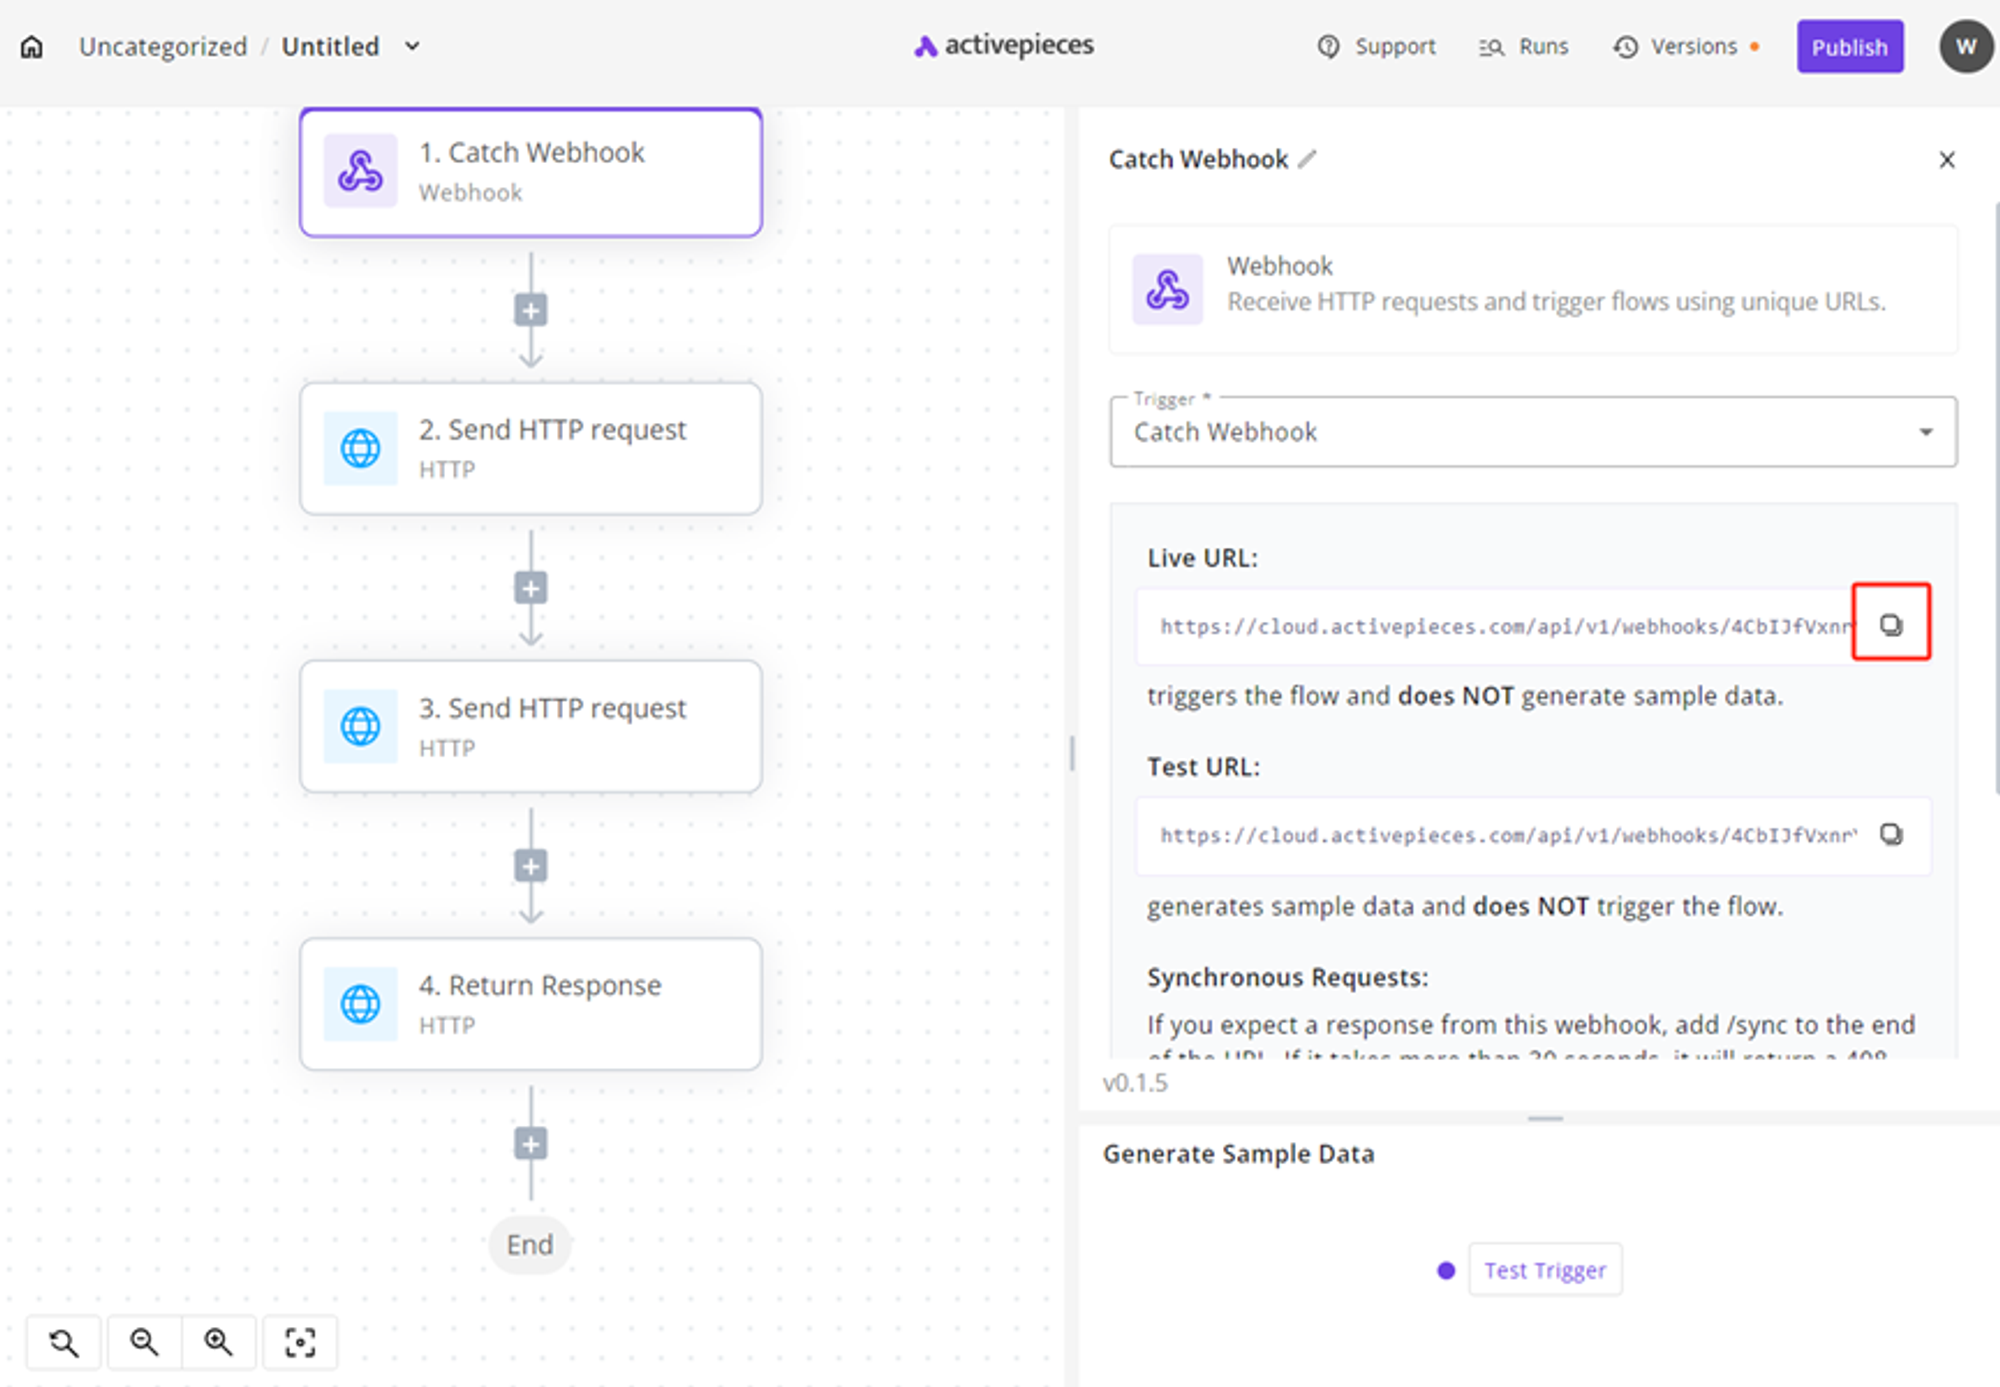
- Add "/sync" to the end of this URL for response return.
- Go to your
settings and paste this full URL into the "Payment API URL" field.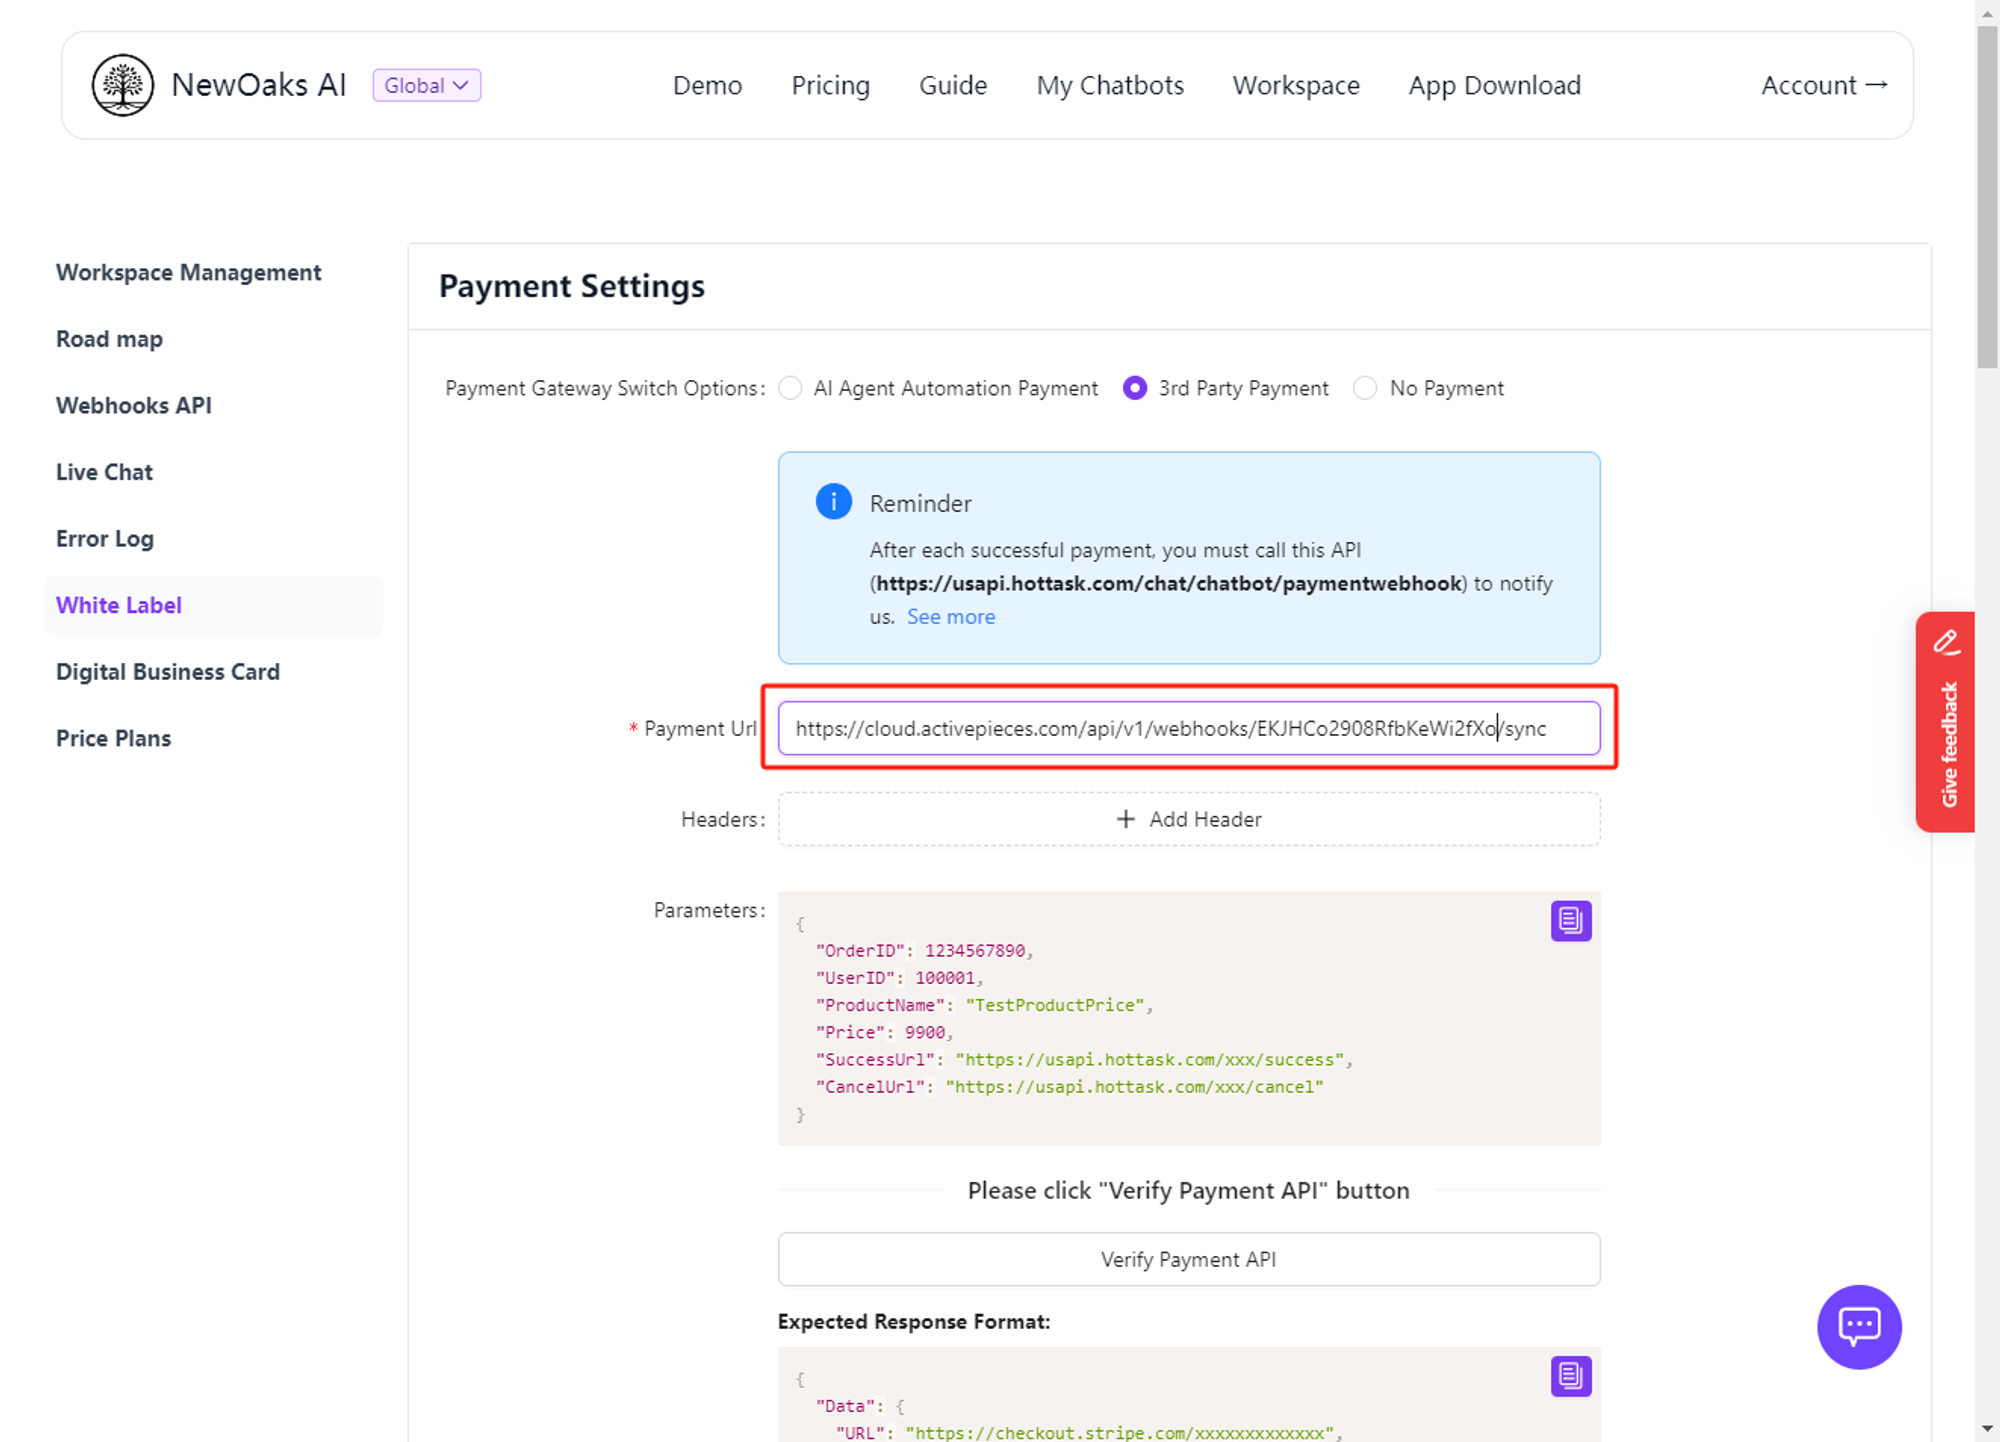
- Click "Verify Payment API" to test the connection.
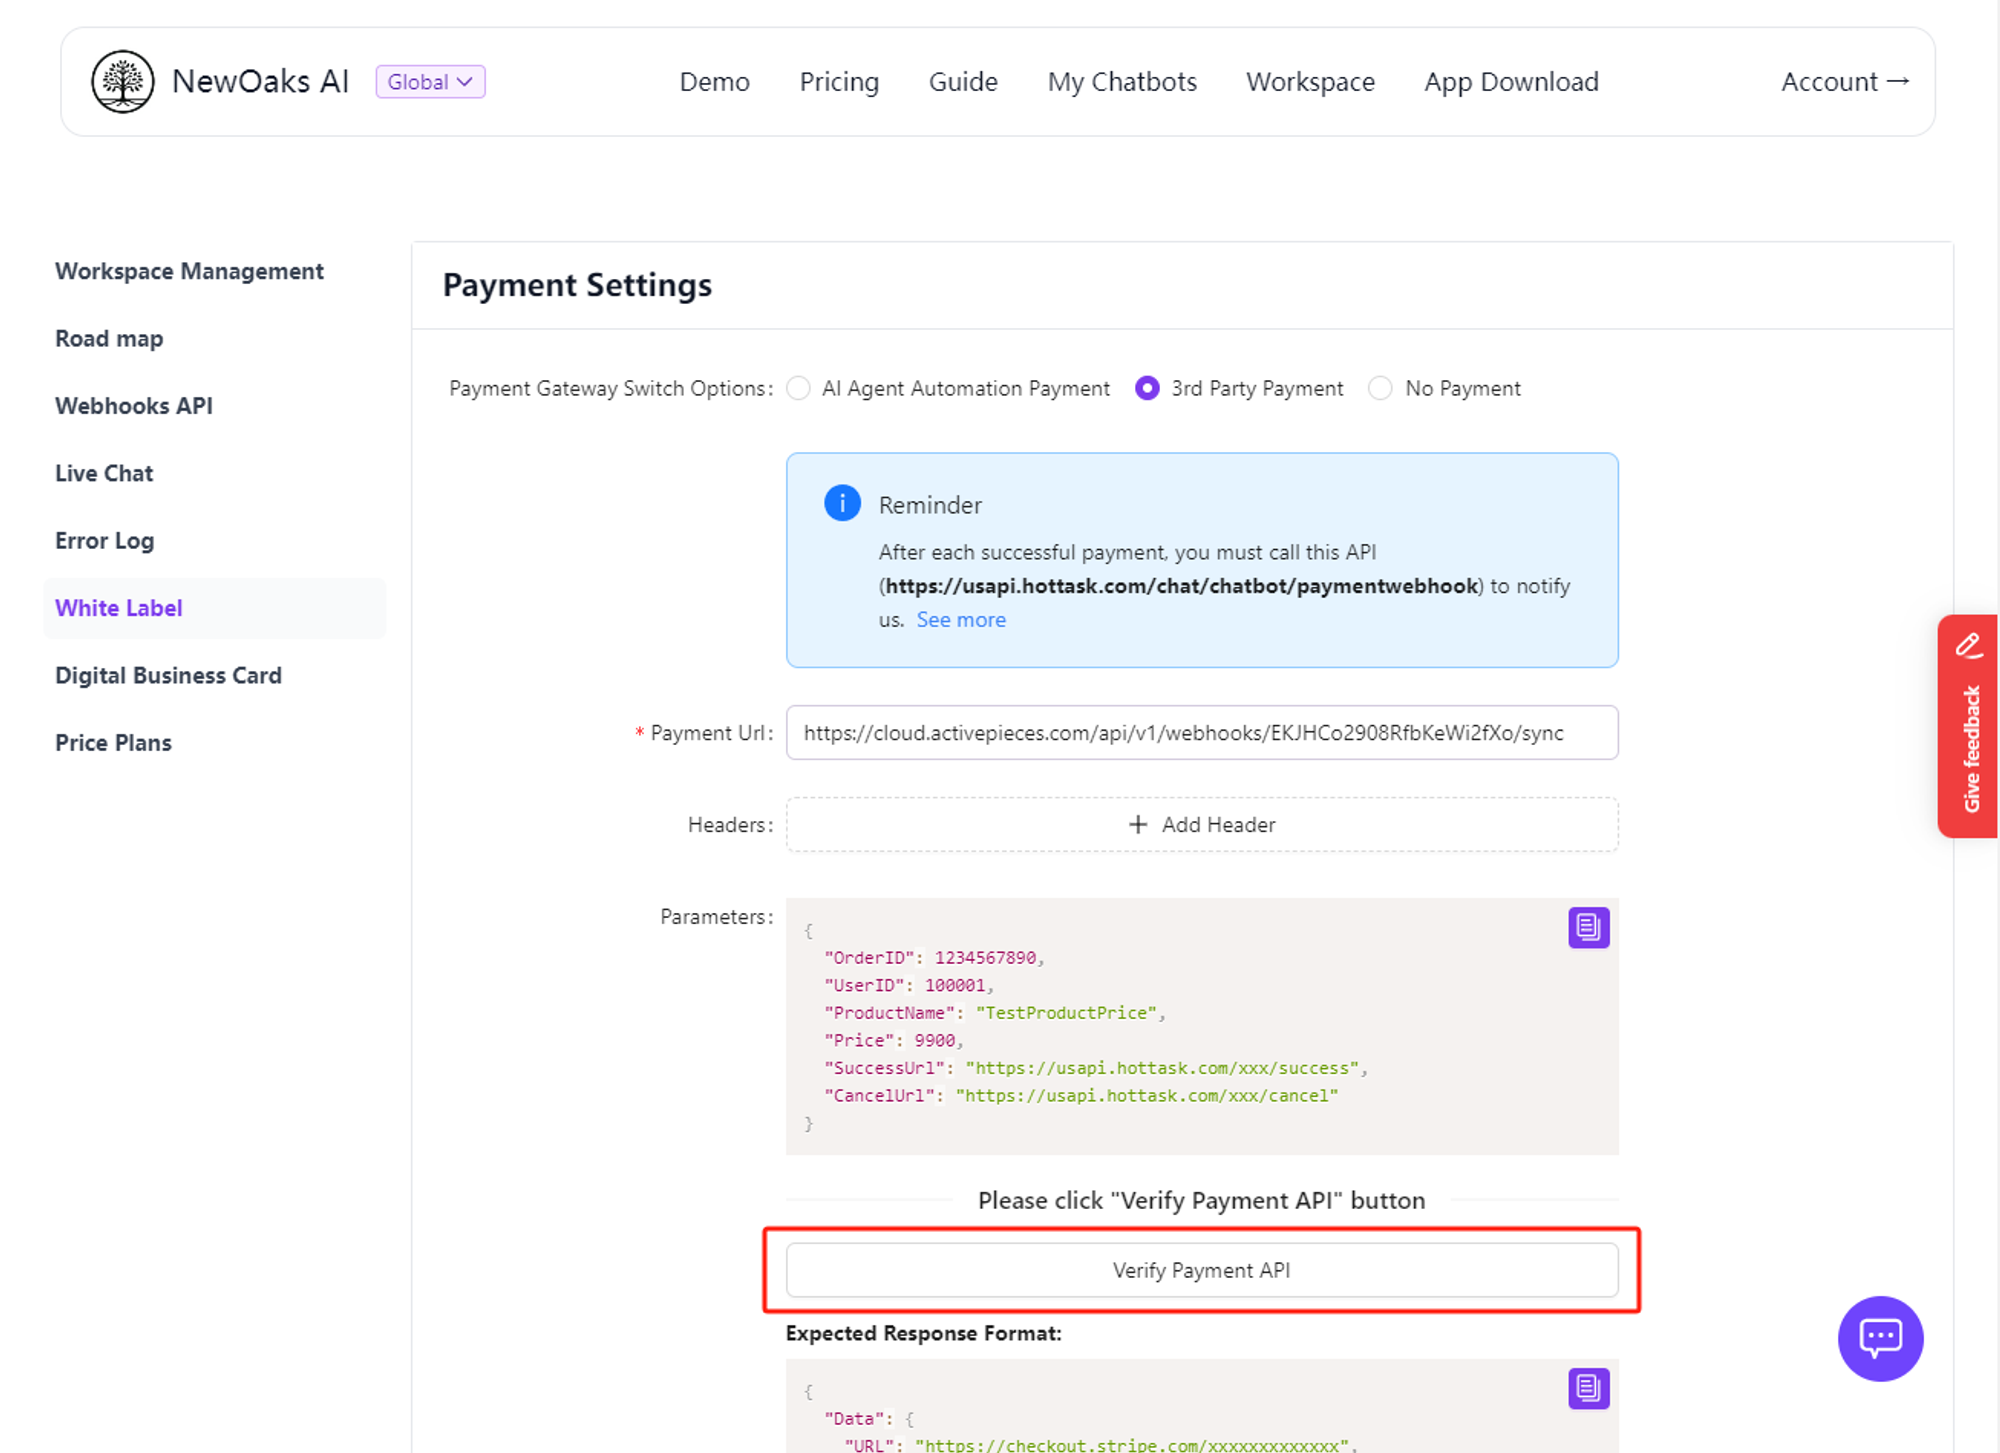
- If successful, click "Save" to finish the setup.
That's it! You've now set up Stripe payments for your Chatbot. Remember, if you need help, don't hesitate to ask for assistance.
Step 2: Payment Success Notifications - Stripe Example
This guide will help you set up a system that notifies you when a payment is successful using Stripe.
Step 1: Get the Template
First, you need to download a special file (called a template) that contains instructions for this process. You can get it from this link: Stripe_InvoicePaid
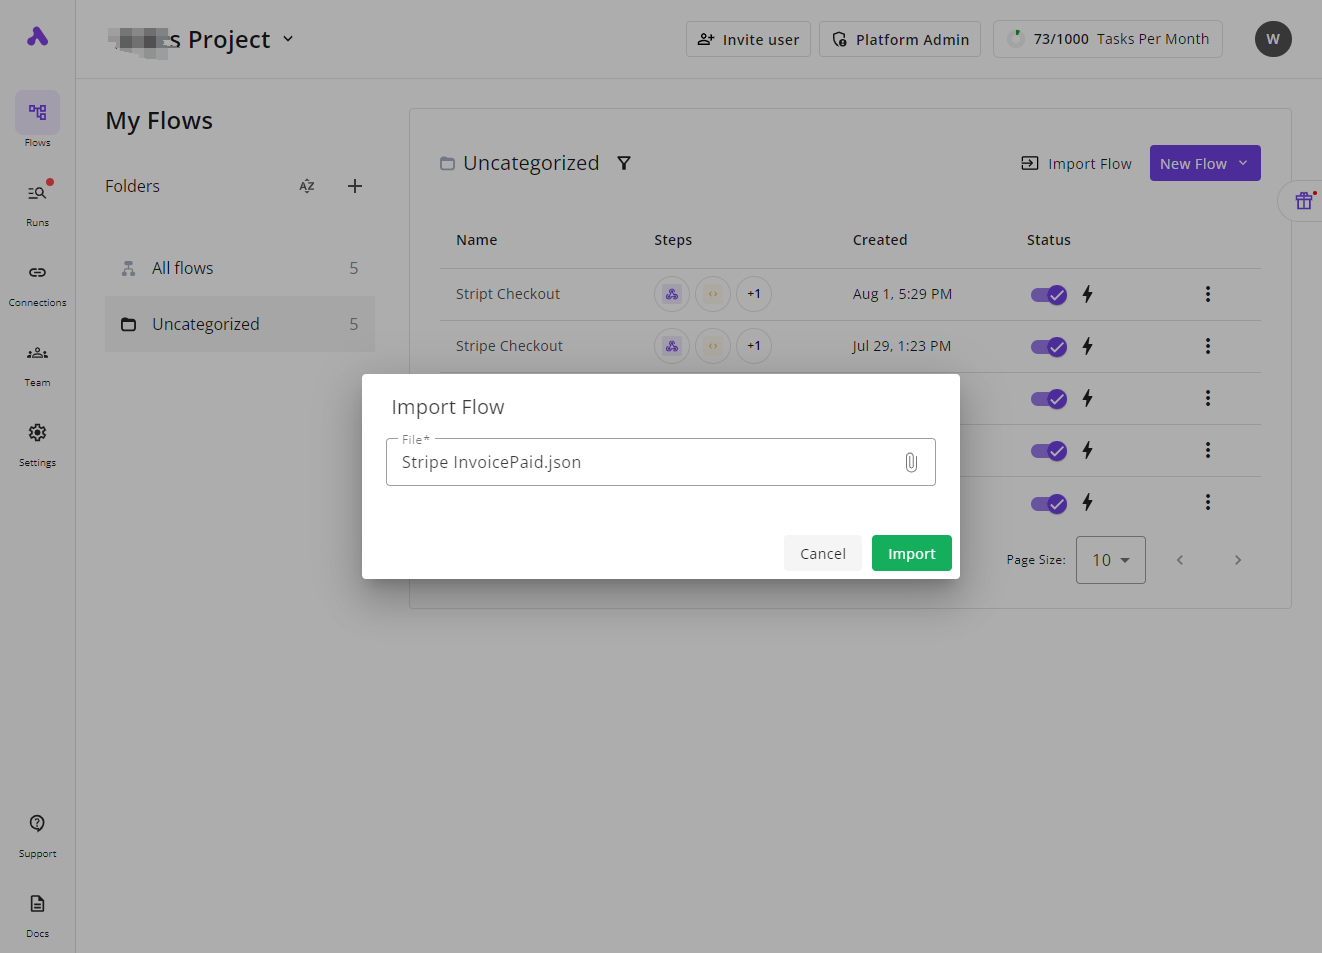
Step 2: Import the Template
- Open your payment management tool (Active Pieces in this example).
- Look for an "Import" button and click it.
- Choose the file you just downloaded.
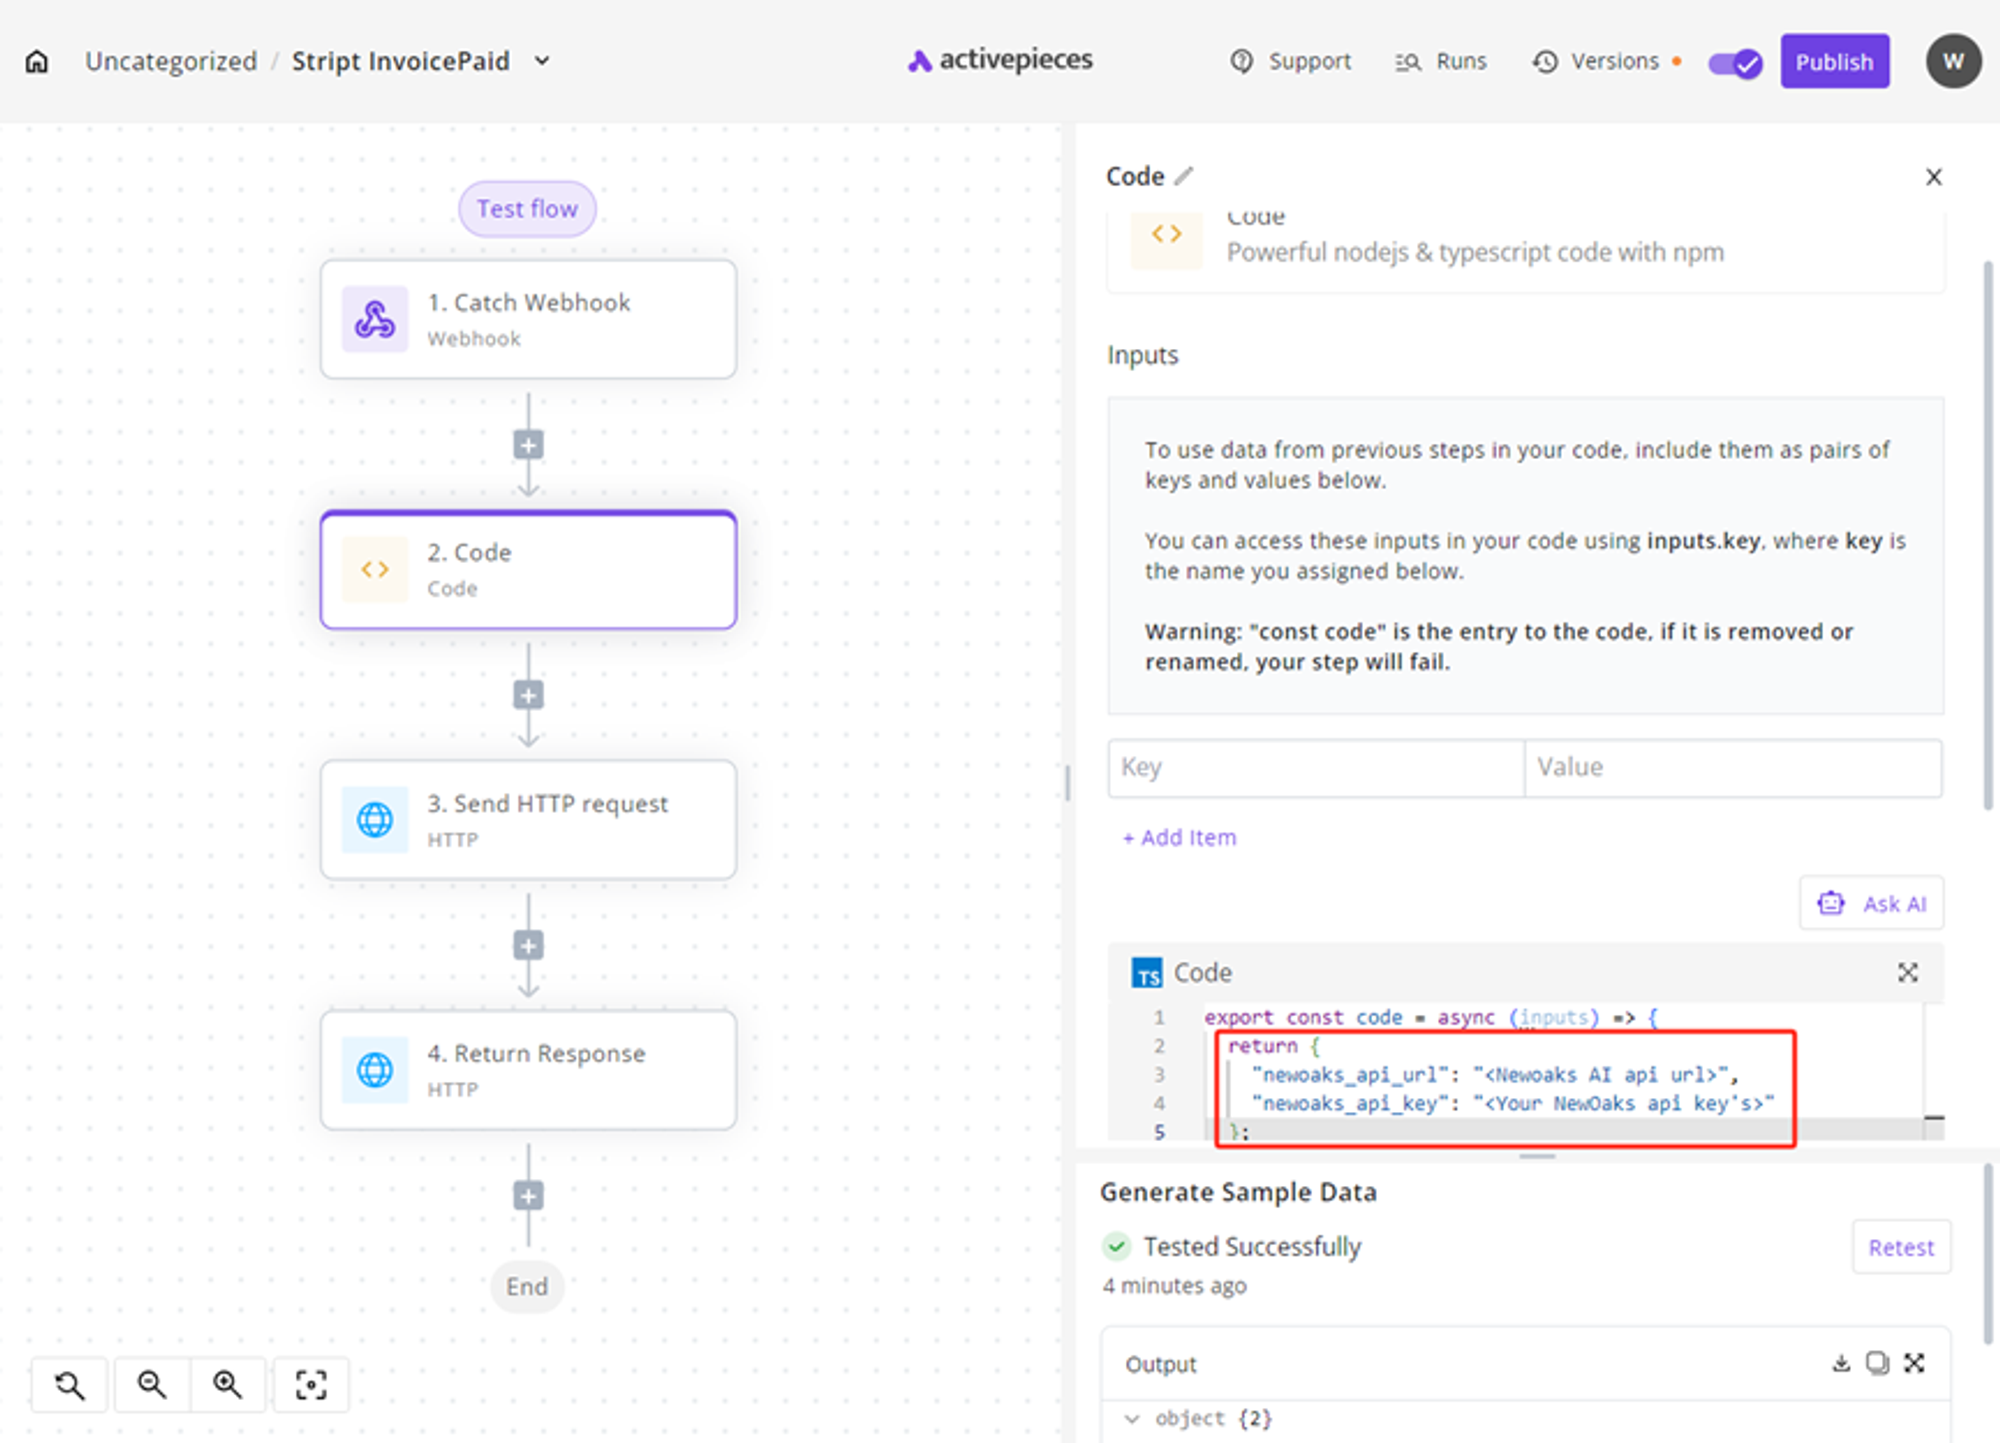
Step 3: Set Up Payment Connection with NewOaks API
'newoaks_api_url': 'https://usapi.hottask.com/chat/Chatbot/PaymentWebHook''newoaks_api_key': '<YOUR-NEWOAKS-API-KEY>'The key for authenticating the API request (found on the Workspace -> Webhooks API -> chatrobot-sessionkey).
These are like a special address and password for your payment system.
Step 4: Publish the Webhook URL
Look for the "Publish" button and click it.
After publishing, you'll get a webhook live URL.

Step 5: Connect to Stripe Event Listeners
Now we need to tell Stripe (the payment processor) to send notifications to your new system.
- Go to the Stripe website webhook pageg:
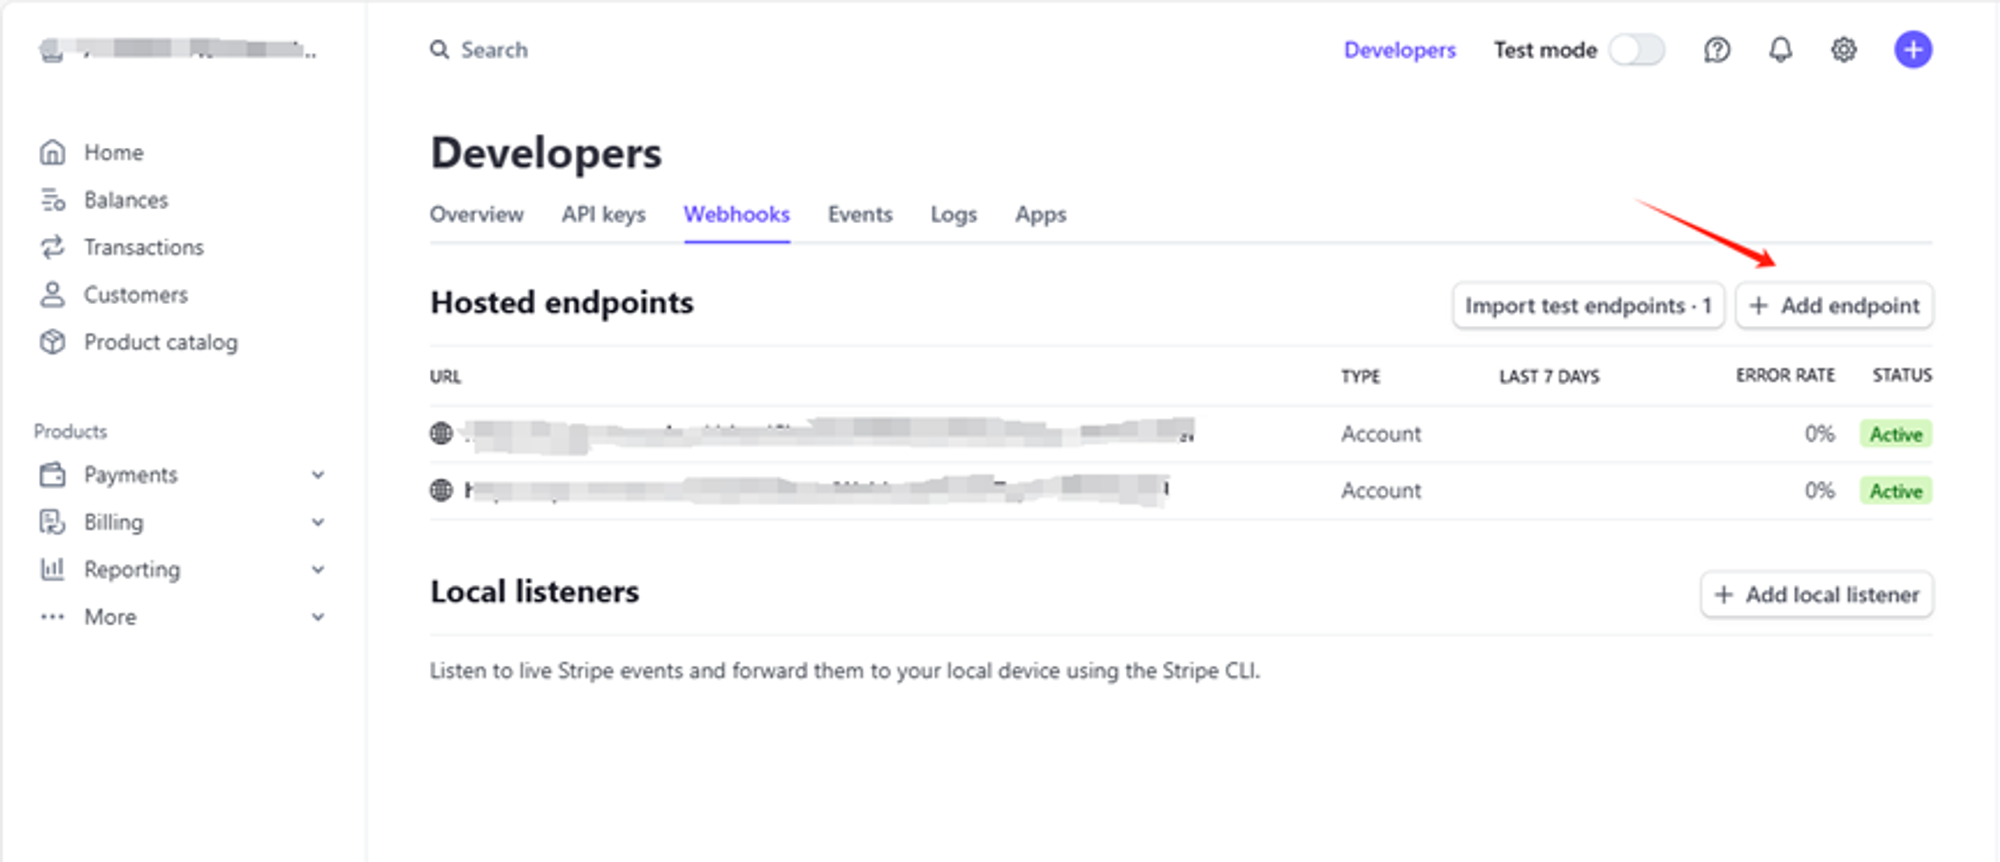
- Look for Add endpoint button to add a new "webhook" (that's what Stripe calls these notifications)
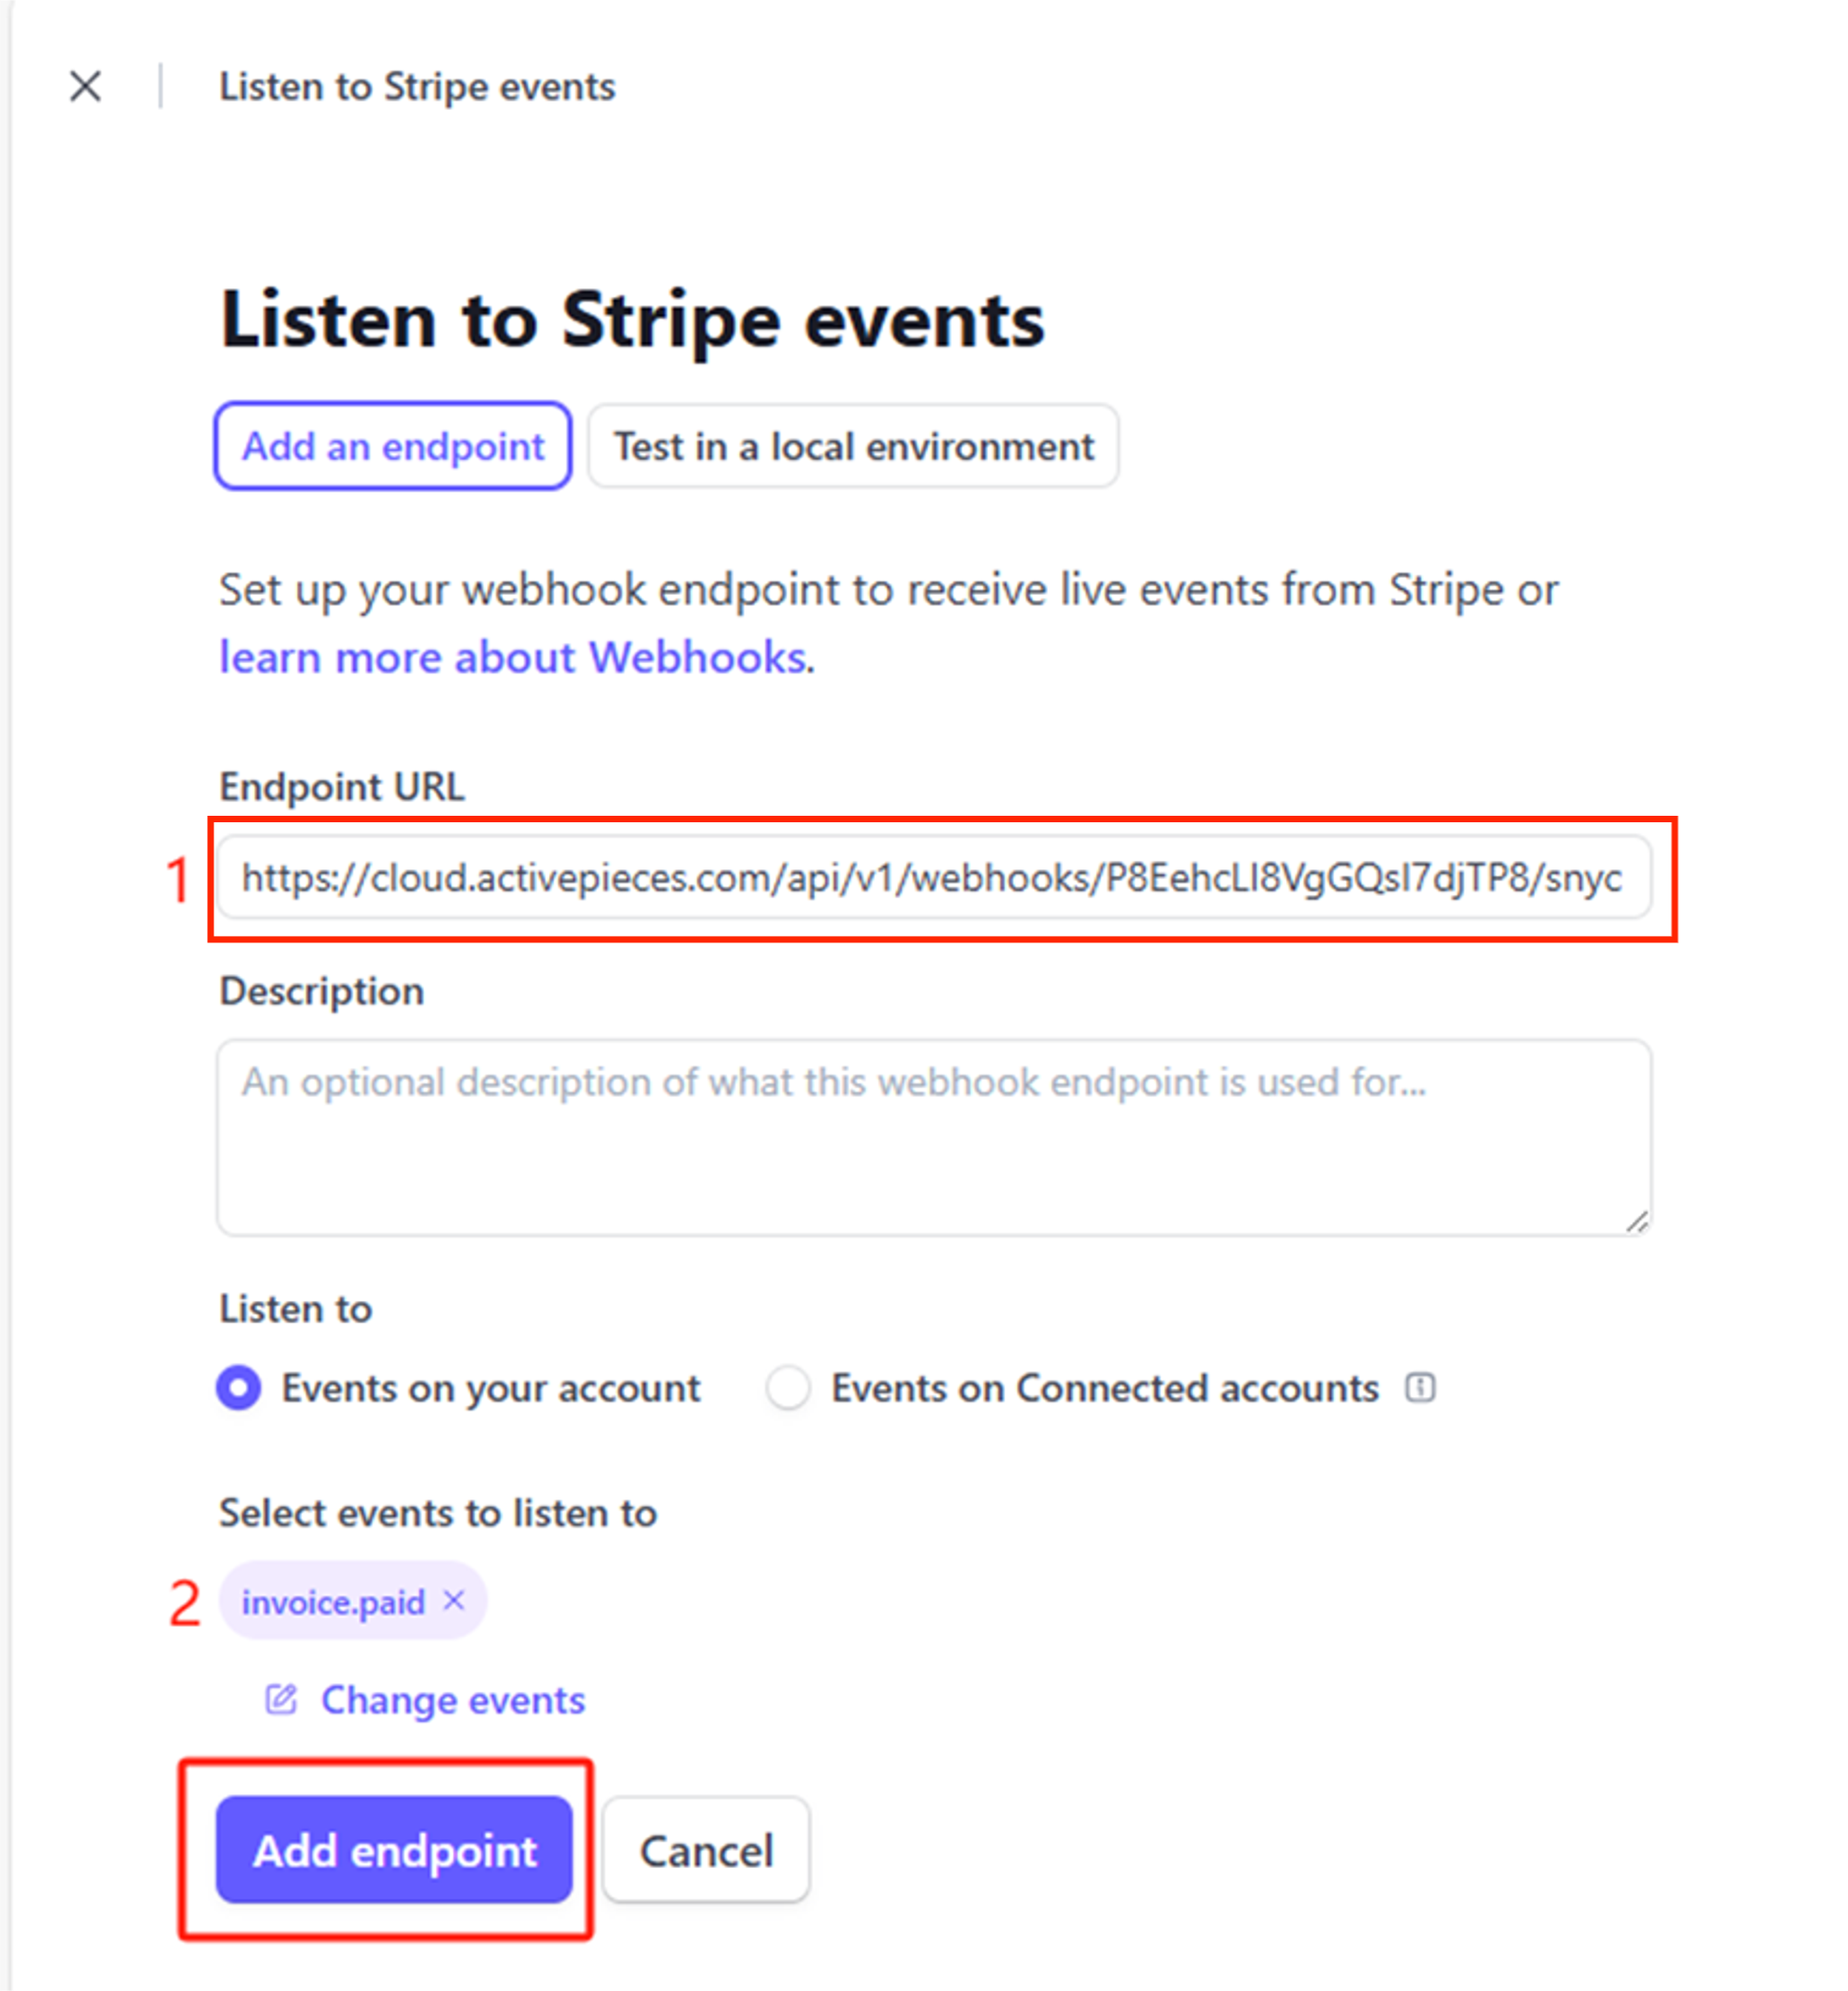
- Copy the webhook live URL from Step4; Add "/sync" to the end of this URL for response return.
- Paste the URL to the Endpoint URL input box.
- Under "Select events", choose "invoice.paid"
- Click Add Endpoint to save it.
This tells Stripe to notify your system whenever an invoice is paid.
That's it! Your system is now set up to receive notifications when a payment is successful.
Remember, if you're not familiar with these tools, it might be a good idea to ask for help from someone with technical experience to ensure everything is set up correctly.
Step 3: Subscription Management (Optional) - Stripe Example
We'll use a no-code platform tool called ActivePieces, but you can use any similar tool you're comfortable with.
Step 1: Setting Up the Get Subscription Info Flow
- Download the template from: Stripe_SubscriptionInfo
- In ActivePieces, click "Import Flow" and select the file you just downloaded.
- You'll need to enter your Stripe API Secret key in the appropriate field.
- Paste Secret Key into the red box below and replace the text in quotation marks:
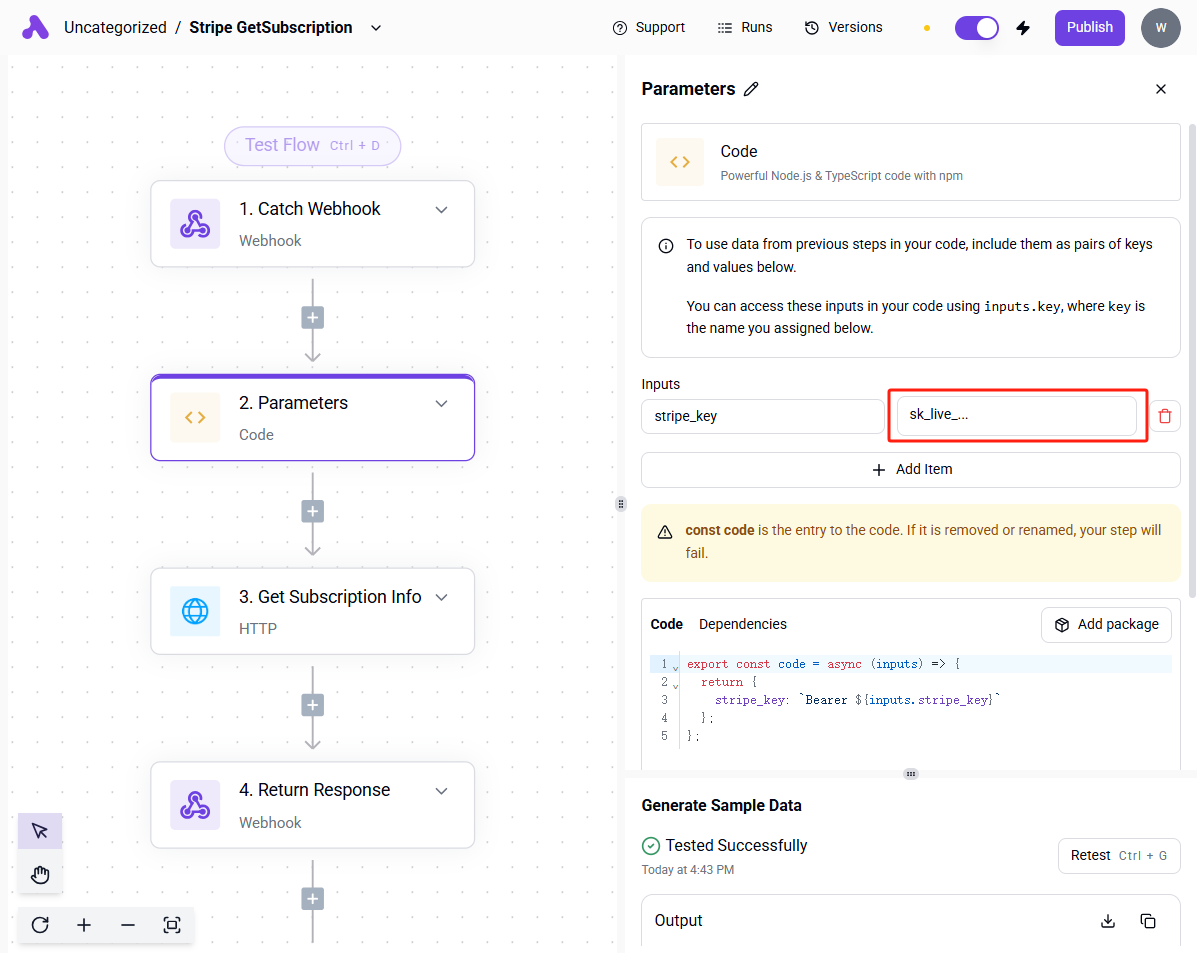
- Click "Publish" to make your flow live.
Step 2: Setting Up the Update Subscription Flow
- Download the template from: Stripe_UpdateSubscription
- In ActivePieces, click "Import Flow" and select the file you just downloaded.
- You'll need to enter your Stripe API Secret key in the appropriate field.
- Paste Secret Key into the red box below and replace the text in quotation marks:
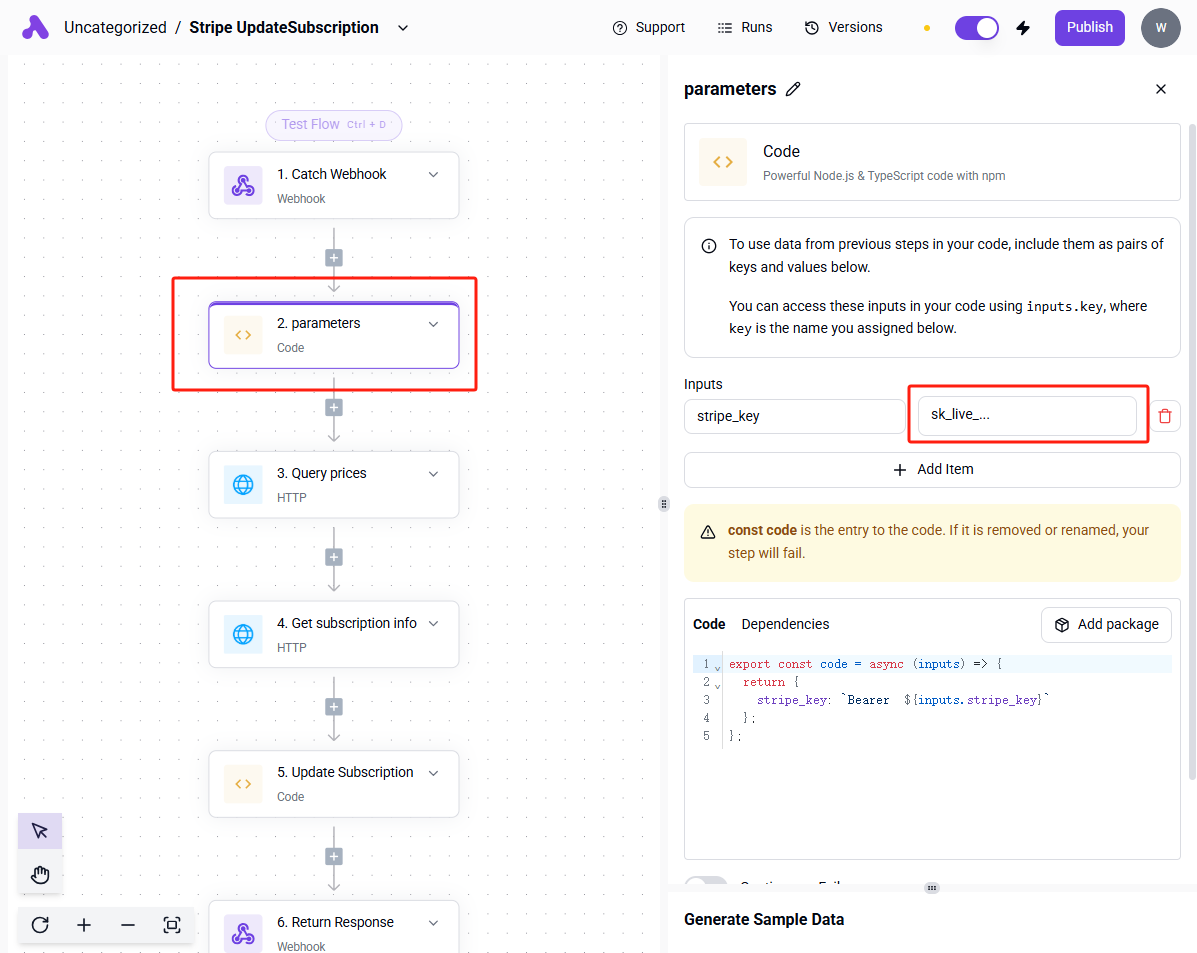
- Click "Publish" to make your flow live.
Step 3: Setting Up the Cancel Subscription Flow
- Download the template from: Stripe_CancelSubscription
- In ActivePieces, click "Import Flow" and select the file you just downloaded.
- You'll need to enter your Stripe API Secret key in the appropriate field.
- Paste Secret Key into the red box below and replace the text in quotation marks:
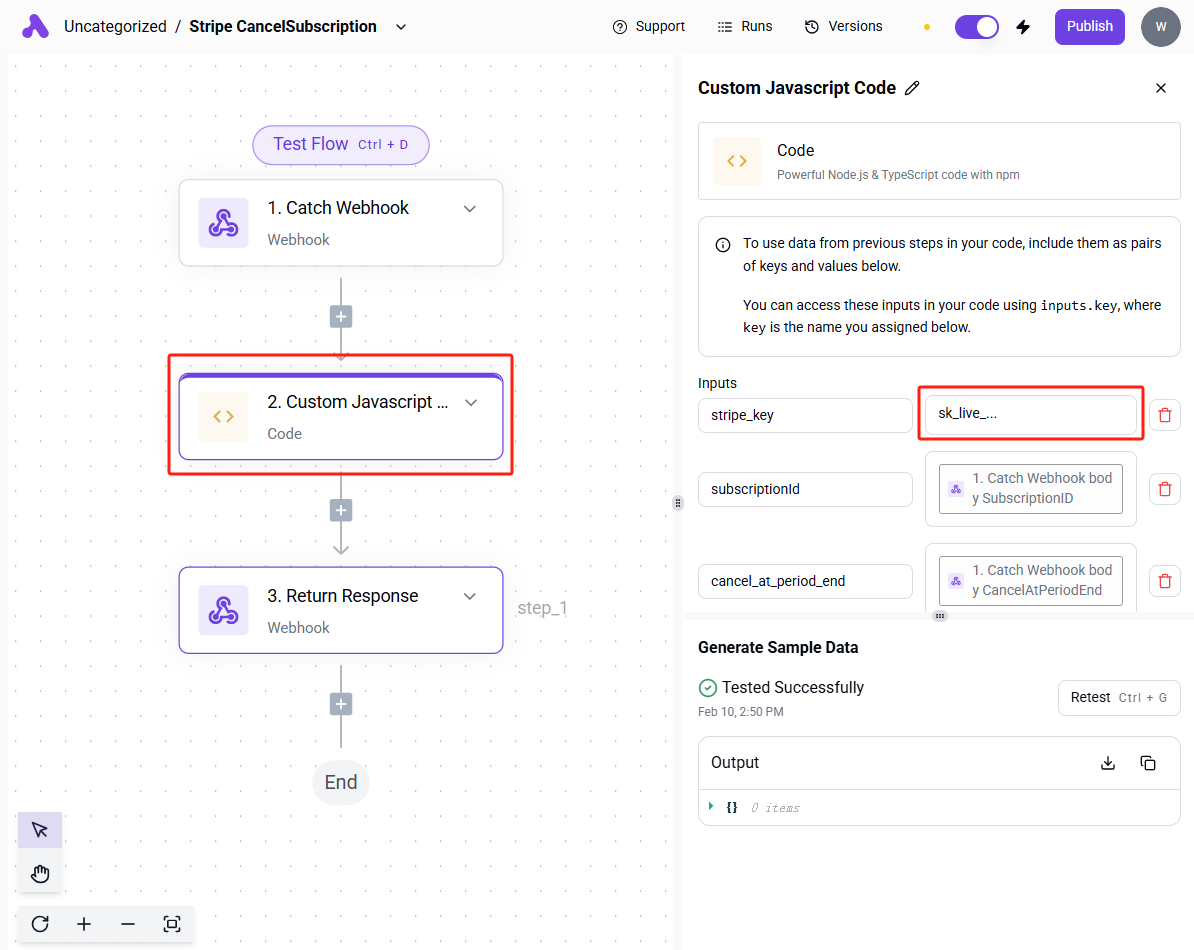
- Click "Publish" to make your flow live.
Step 4: Connecting to
- After publishing, you'll get a webhook URL.
- Add "/sync" to the end of this URL for response return.
- Go to your
settings and paste this full URL into the corresponding fields.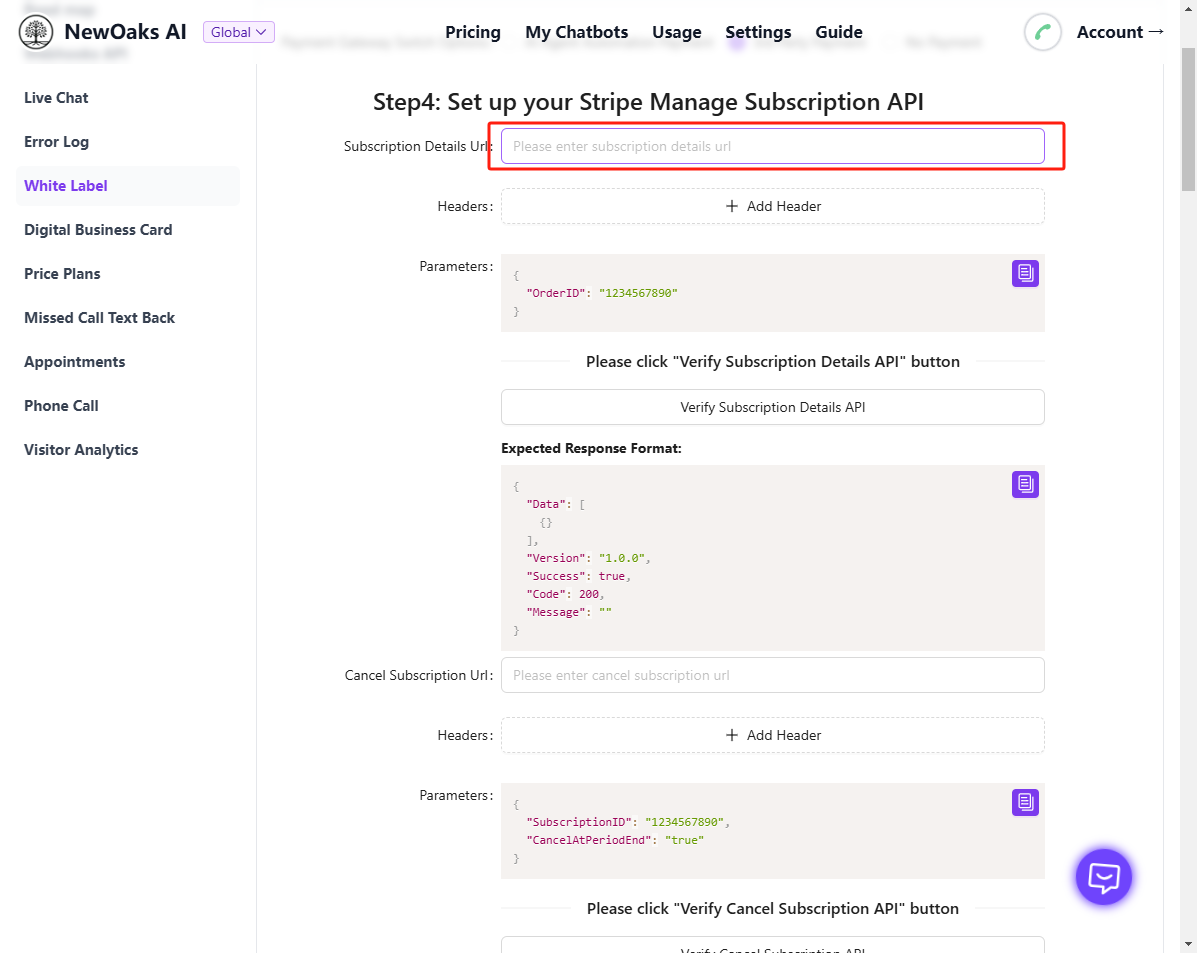
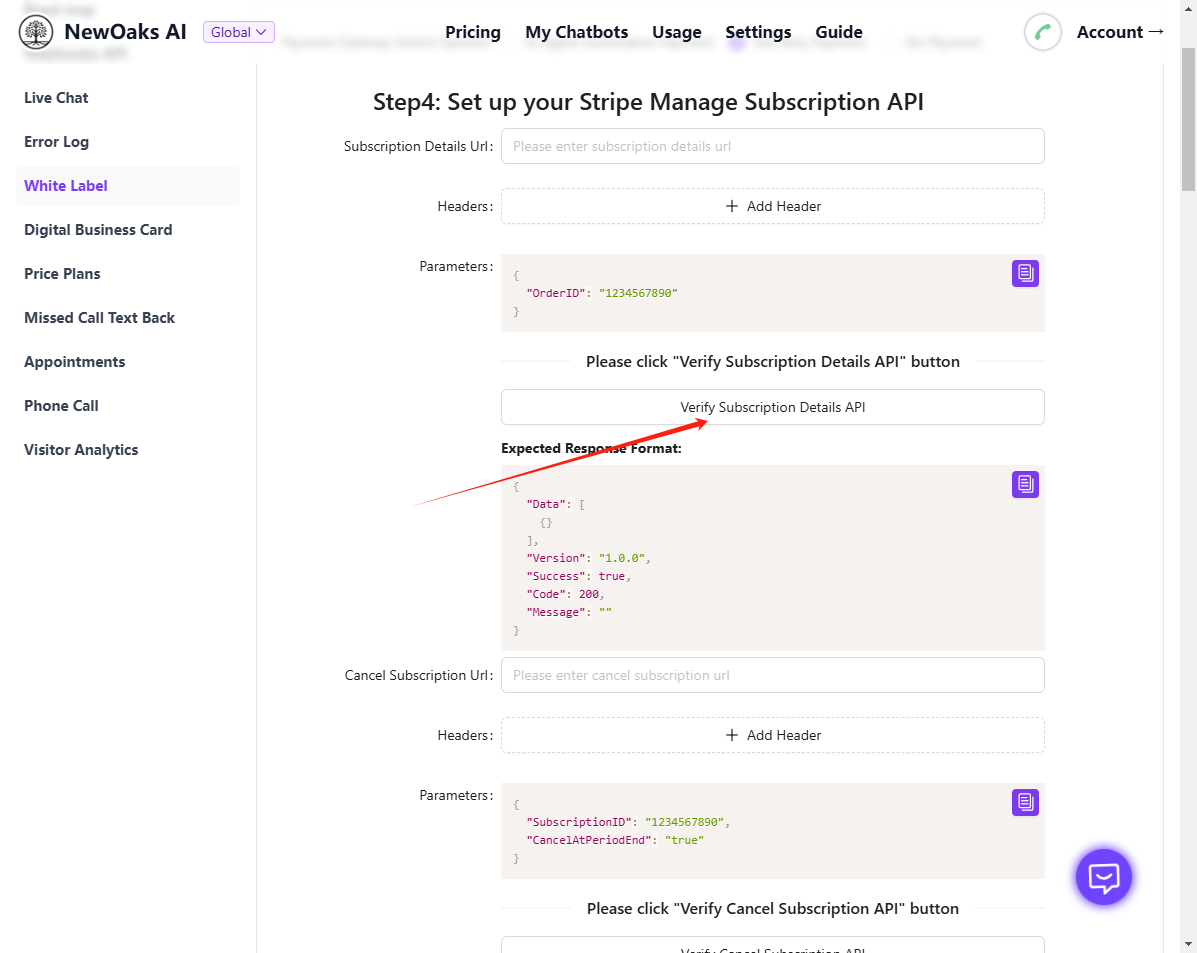
- Click "Verify Subscription Details API" to test the connection.
- Follow the above steps to configure the remaining two webhooks together.
- Click "Save" to finish the setup.
Note: Follow the steps to correctly fill in the webhook addresses of the three Flows into the corresponding input boxes, and verify that the subscription management configuration is completed.